Quantcast
Channel: MongoDB | Blog
Viewing all 2423 articles
Browse latest View live

Thinking in Documents: Part 2

$
0
0

In part 1 of this 2-part blog series, we introduced the concept of documents and some of the advantages they provide. In this part, we will start to put documents into action by discussing schema design. We will cover how to manage related data with embedding and referencing, we’ll touch on indexing and the MongoDB transaction model.

Defining Your Document Schema

You should start the schema design process by considering the application’s query requirements. The data should be modeled in a way that takes advantage of the document model’s flexibility. When migrating the data model between relational tables and documents, it may be easy to mirror the relational database’s flat schema to the document model. However, this approach negates the advantages enabled by the document model’s rich, embedded data structures.

The application’s data access patterns should govern schema design, with specific understanding of:

  • The read/write ratio of database operations.
  • The types of queries and updates performed by the database.
  • The life-cycle of the data and growth rate of documents.

If coming from a relational background a good first step is to identify the operations performed on the application’s data, comparing:

  1. How these would be implemented by a relational database;
  2. How MongoDB could implement them.

Figure 1 represents an example of this exercise.

ApplicationRDBMS ActionMongoDB Action
Create Product RecordINSERT to (n) tables (product description, price, manufacturer, etc.)insert() to one document with sub-documents, arrays
Display Product RecordSELECT and JOIN(n) product tablesfind() document
Add Product ReviewINSERT to "review" table, foreign key to product recordinsert() to "review" collection, reference to product document
More actions.........

Figure 1: Analyzing queries to design the optimum schema

This analysis helps to identify the ideal document schema for the application data and workload, based on the queries and operations to be performed against it.

If migrating from a relational database, you can also identify the existing application's most common queries by analyzing the logs maintained by the RDBMS. This analysis identifies the data that is most frequently accessed together, and can therefore potentially be stored together within a single MongoDB document.

Modeling Relationships with Embedding and Referencing

Deciding when to embed a document or instead create a reference between separate documents in different collections is an application-specific consideration. There are, however, some general considerations to guide the decision during schema design.

Embedding

Data with a 1:1 or 1:Many relationship (where the “many” objects always appear with, or are viewed in the context of their parent documents) is a natural candidate for embedding the referenced information within the parent document. The concept of data ownership and containment can also be modeled with embedding. Using the product data example above, product pricing – both current and historical – should be embedded within the product document since it is owned by and contained within that specific product. If the product is deleted, the pricing becomes irrelevant.

DBAs should also embed fields that need to be modified together atomically. To learn more, refer to the section below on the MongoDB transaction model.

Not all 1:1 or 1:Many relationships should be embedded in a single document. Instead, referencing between documents in different collections should be used when:

  • A document is frequently read, but contains an embedded document that is rarely accessed. An example might be a customer record that embeds copies of the annual general report. Embedding the report only increases the in-memory requirements (the working set) of the collection.
  • One part of a document is frequently updated and constantly growing in size, while the remainder of the document is relatively static.
  • The document size exceeds MongoDB’s current 16MB document limit.

Referencing

Referencing enables data normalization, and can give more flexibility than embedding. But the application will issue follow-up queries to resolve the reference, requiring additional round-trips to the server.

References are usually implemented by saving the _id field of one document in the related document as a reference. A second query is then executed by the application to return the referenced data.

Referencing should be used:

  • When embedding would not provide sufficient read performance advantages to outweigh the implications of data duplication.
  • Where the object is referenced from many different sources.
  • To represent complex many-to-many relationships.
  • To model large, hierarchical data sets.

Different Design Goals

Comparing these two design options – embedding sub-documents versus referencing between documents – highlights a fundamental difference between relational and document databases:

  • The RDBMS optimizes data for storage efficiency (as it was conceived at a time when storage was the most expensive component of the system).
  • MongoDB’s document model is optimized for how the application accesses data (as developer time and speed to market are now more expensive than storage).

Data modeling considerations, patterns and examples including embedded versus referenced relationships are discussed in more detail in the documentation.

MongoDB Transaction Model

Relational databases typically have well-developed features for data integrity, including ACID transactions and constraint enforcement. Rightly, users do not want to sacrifice data integrity as they move to new types of databases. With MongoDB, users can maintain many capabilities of relational databases, even though the technical implementation of those capabilities may be different; we have already seen this in part 1 of the series where we discussed JOINs.

MongoDB write operations are ACID-compliant at the document level – including the ability to update embedded arrays and sub-documents atomically. By embedding related fields within a single document, users get the same integrity guarantees as a traditional RDBMS, which has to synchronize costly ACID operations and maintain referential integrity across separate tables.

Document-level ACID compliance in MongoDB ensures complete isolation as a document is updated; any errors cause the operation to roll back and clients receive a consistent view of the document.

Despite the power of single-document atomic operations, there may be cases that require multi-document transactions. There are multiple approaches to this – including using the findandmodify command that allows a document to be updated atomically and returned in the same round trip. findandmodify is a powerful primitive on top of which users can build other more complex transaction protocols. For example, users frequently build atomic soft-state locks, job queues, counters and state machines that can help coordinate more complex behaviors.

Another alternative entails implementing a two-phase commit to provide transaction-like semantics.

How Can I Get to my Data?

Unlike a lot of other non-relational databases, MongoDB has a rich query model and powerful secondary indexes that provide flexibility in how data is accessed.

As with any database – relational or non-relational – indexes are the single biggest tunable performance factor and are therefore integral to schema design. Indexes in MongoDB largely correspond to indexes in a relational database. MongoDB uses B-Tree indexes, and natively supports secondary indexes. As such, it will be immediately familiar to those coming from a SQL background.

The type and frequency of the application’s queries should inform index selection. As with all databases, indexing does not come free: it imposes overhead on writes and resource (disk and memory) usage.

By default, MongoDB creates an index on the document’s _id primary key field. All user-defined indexes are secondary indexes. Any field can be used for a secondary index, including fields within arrays. Index options for MongoDB include:

  • Compound Indexes
  • Geospatial Indexes
  • Text Search Indexes
  • Unique Indexes
  • Array Indexes
  • TTL Indexes
  • Sparse Indexes
  • Hash Indexes

MongoDB also supports index intersection, allowing the use of multiple indexes to fulfill a query.

Next Steps

Having read this far, hopefully you now have a pretty good idea on how to “think in documents,” rather than tables. But you probably want to learn more. Take a look at the Thinking in Documents webinar.

<< Read Part 1


To look at specific considerations in moving from relational databases, download the guide below.

DOWNLOAD THE RDBMS MIGRATION GUIDE


This guide goes into more detail on:

  • The different types of secondary indexes in MongoDB
  • The aggregation framework, providing similar functionality to the GROUP_BY and related SQL statements, in addition to enabling in-database transformations
  • Implementation validation and constraints
  • Best practices for migrating data from relational tables to documents

DICE Scales with MongoDB to Sell-Out Wembley Stadium in Less than 60 Seconds

$
0
0

Many of the largest and most sophisticated companies in the world rely on MongoDB, including over a third of the Fortune 100. In addition to well established businesses using the modern database, innovative start ups from around the world put MongoDB at the heart of their data strategy.

This blog series highlights three UK-based start ups transforming their industries with MongoDB. First up, DICE.


Why are we charged booking fees when we buy a ticket to see our favorite band? Years ago, there was a reason. Companies had to manually process orders, print and mail out tickets to fans - which involved a cost. Today, we carry around powerful devices everywhere we go and booking is simply a few swipes, a click and then the ticket is delivered directly to your phone.

Booking fees are dinosaurs, and DICE wants to be the meteor that wipes them out. The guardian described it as: “DICE aims to take tickets out of the hands of touts and put them into the phones of fans.”

However, it’s much more than that at DICE. We’re building applications that have Wembley Stadium scale and to do it, we’re relying on MongoDB.

Best Gigs, No Booking Fees, But lots of data

Built entirely on MongoDB, DICE went live on September 19th 2014 and we launched big. Users had access to big shows such as Jack White at 02 Arena and Red Bull Culture Clash at Earls Court Arena as well as lots of amazing smaller shows featuring brilliant bands.

However, building a robust application that scales up to massive peaks of activity as ticket sales go online requires a lot of backend engineering.

We’ve all been there, sitting at a laptop at 9am, trying to refresh and pulling our hair out because we don’t know if we’ve actually got the tickets we just bought. It turns out building a ticketing application that can have high performance with thousands of operations a second isn’t all that easy. But we had a mission.

How to Sell Out Wembley Stadium - In A Minute

When I joined DICE that was the challenge I was tasked with - how can we sell a million tickets and have the application work seamlessly, while providing a consistent view of ticket inventory. In all of my previous roles, whenever I needed a database with great performance, I went with MongoDB.

Once we did some initial testing and the DICE team saw how intuitive MongoDB was to develop on and how well it performed, MongoDB was an obvious decision. It quickly became a key part of our data strategy and therefore our business plan.

Some of the capabilities that come baked into MongoDB have been vital to our success. For instance, if we need to sell 90,000 tickets for an event, we have to be absolutely sure we don’t end up selling 90,001 or 90,100. Which is kind of obvious, but when bottlenecks start and maybe 150 people are all buying the same ticket at the same time, it’s actually a tricky problem to solve.

We implemented a managed object pool within MongoDB, that creates all the tickets beforehand taking advantage of MongoDB ACID compliant operations. This ensures that each customer gets a unique ticket for the event. That’s our take on concurrency.

Using that system, we know we can sell 90,000 tickets a minute, with the site still performing comfortably. That’s basically Wembley Stadium, every minute, and we know exactly where to push to get those numbers even higher. The reason we can do that is because we have a database that is rock solid at scale.

Our headquarters are currently in London and we are rolling out to more UK cities, before taking on Europe and North America. Selecting a database that can scale as our business grows is essential.

As with many start ups, expanding quickly is a key metric - we need users and we need lots of them. Geographic growth is good, but it also can add complexity for our data. MongoDB is well placed to help address that.

If we’re selling tickets to an LA concert, we need to ensure that the customer has the same excellent experience as a customer in the UK or in Europe. To do this, we have to distribute data to local servers that are physically near to our customers. To make this run smoothly we’ll use MongoDB’s location-aware sharding, to ensure that if someone is in LA, they will be routed to a local server which eliminates the effects of cross-continent geographic latency.

As we expand, we know we need to offer a great service to customers and our partners. Crucially we have to also present a robust plan to potential investors. Having MongoDB at the heart of our application strategy means we’re in a place where we feel very good about scaling this wonderful, crazy idea - best gigs, no booking fees.

Also, we’re looking for all sorts of people to join our team, in particular a MongoDB database administrator.

To see how organizations around the world are building applications never before possible, read our white paper on quantifying business advantage:

READ MORE ABOUT THE VALUE OF DATABASE SELECTION

Retail Reference Architecture Part 2: Approaches to Inventory Optimization

$
0
0

In part one of our series on retail reference architecture we looked at some best practices for how a high-volume retailer might use MongoDB as the persistence layer for a large product catalog. This involved index, schema, and query optimization to ensure our catalog could support features like search, per-store pricing and browsing with faceted search in a highly performant manner. Over the next two posts we will be looking at approaches to similar types of optimization, but applied to an entirely different aspect of retail business, inventory.

A solid central inventory system that is accessible across a retailer’s stores and applications is a large part of the foundation needed for improving and enriching the customer experience. Here are just a few of the features that a retailer might want to enable:

  • Reliably check real-time product availability.
  • Give the option for in-store pick-up at a particular location.
  • Detect the need for intra-day replenishment if there is a run on an item.

The Problem with Inventory Systems

These are features that seem basic but they present real challenges given the types of legacy inventory systems commonly used by major retailers. In these systems, individual stores keep their own field inventories, which then report data back to the central RDBMS at a set time interval, usually nightly. That RDBMS then reconciles and categorizes all of the data received that day and makes it available for operations like analytics, reporting, as well as consumption by external and internal applications. Commonly there is also a caching layer present between the RDBMS and any applications, as relational databases are often not well-suited to the transaction volume required by such clients, particularly if we are talking about a consumer-facing mobile or web app.

So the problem with the status quo is pretty clear. The basic setup of these systems isn’t suited to providing a continually accurate snapshot of how much inventory we have and where that inventory is located. In addition, we also have the increased complexity involved in maintaining multiple systems, i.e. caching, persistence, etc. MongoDB, however, is ideal for supporting these features with a high degree of accuracy and availability, even if our individual retail stores are very geographically dispersed.

Design Principles

To begin, we determined that the inventory system in our retail reference architecture needed to do the following:

  • Provide a single view of inventory, accessible by any client at any time.
  • Be usable by any system that needs inventory data.
  • Handle a high-volume, read-dominated workload, i.e. inventory checks.
  • Handle a high volume of real-time writes, i.e. inventory updates.
  • Support bulk writes to refresh the system of record.
  • Be geographically distributed.
  • Remain horizontally scalable as the number of stores or items in inventory grows.

In short, what we needed was to build a high performance, horizontally scalable system where stores and clients over a large geographic area could transact in real-time with MongoDB to view and update inventory.

Stores Schema

Since a primary requirement of our use case was to maintain a centralized, real-time view of total inventory per store, we first needed to create the schema for a stores collection so that we had locations to associate our inventory with. The result is a fairly straightforward document per store:

We then created the following indices to optimize the most common types of reads on our store data:

  • {“storeId”:1},{“unique”:true}: Get inventory for a specific store.
  • {“name”:1}: Get a store by name.
  • {“address.zip”:1}: Get all stores within a zip code, i.e. store locator.
  • {“location”: 2dsphere}: Get all stores around a specified geolocation.

Of these, the location index is especially useful for our purposes, as it allows us to query stores by proximity to a location, e.g. a user looking for the nearest store with a product in stock. To take advantage of this in a sharded environment, we used a geoNear command that retrieves the documents whose ‘location’ attribute is within a specified distance of a given point, sorted nearest first:

This schema gave us the ability to locate our objects, but the much bigger challenge was tracking and managing the inventory in those stores.

Inventory Data Model

Now that we had stores to associate our items with, we needed to create an inventory collection to track the actual inventory count of each item and all its variants. Some trade-offs were required for this, however. To both minimize the number of roundtrips to the database, as well as mitigate application-level joins, we decided to duplicate data from the stores collection into the inventory collection. The document we came up with looked like this:

Notice first that we included both the ‘storeId’ and ‘location’ attribute in our inventory document. Clearly the ‘storeId’ is necessary so that we know which store has what items, but what happens when we are querying for inventory near the user? Both the inventory data and store location data are required to complete the request. By adding geolocation data to the inventory document we eliminate the need to execute a separate query to the stores collection, as well as a join between the stores and inventory collections.

For our schema we also decided to represent inventory in our documents at the productId level. As was noted in part one of our retail reference architecture series, each product can have many, even thousands of variants, based on size, color, style, etc., and all these variants must be represented in our inventory. So the question is should we favor larger documents that contain a potentially large variants collection, or many more documents that represent inventory at the variant level? In this case, we favored larger documents to minimize the amount of data duplication, as well as decrease the total number of documents in our inventory collection that would need to be queried or updated.

Next, we created our indices:

  • {storeId:1}: Get all items in inventory for a specific store.
  • {productId:1},{storeId:1}: Get inventory of a product for a specific store.
  • {productId:1},{location:”2dsphere”}: Get all inventory of a product within a specific distance.

It’s worth pointing out here that we chose not to include an index with ‘vars.sku’. The reason for this is that it wouldn’t actually buy us very much, since we are already able to do look ups in our inventory based on ‘productID’. So, for example, a query to get a specific variant sku that looks like this:

Doesn’t actually benefit much from an added index on ‘vars.sku’. In this case, our index on ‘productId’ is already giving us access to the document, so an index on the variant is unnecessary. In addition, because the variants array can have thousands of entries, an index on it could potentially take up a large block in memory, and consequently decrease the number of documents stored in memory, meaning slower queries. All things considered, an unacceptable trade-off, given our goals.

So what makes this schema so good anyhow? We’ll take a look in our next post at some of the features this approach makes available to our inventory system.

Learn More

To discover how you can re-imagine the retail experience with MongoDB, read our white paper. In this paper, you'll learn about the new retail challenges and how MongoDB addresses them.

To find out how MongoDB’s consulting team can get your app off the ground faster, explore our Rapid Start engagement.

LAUNCH YOUR APP FASTER

<< Read Part 1

How MongoDB Powers The Social Platform Taking London By Storm

$
0
0

Many of the largest and most sophisticated companies in the world rely on MongoDB, including over a third of the Fortune 100. In addition to well established businesses using the modern database, innovative start ups from around the world put MongoDB at the heart of their data strategy.

This blog series highlights three UK-based start ups transforming their industries with MongoDB. This week, Urber. In part one of this series we looked at innovative ticketing site DICE.


Urber is a city blogging platform where users share what they love about their city; from food reviews to art events and everything in-between.

We developed the social platform when we realized that there was simply no great place to collectively share city stories, news and tips. The response has already been fantastic - over the last quarter we’ve seen 70% growth in our total number of users and 100% growth in the amount of content on the site.

However, building a platform with a high-level of functionality that could also scale like this, posed some interesting development challenges.

In order to create a data strategy on which to build our business, the development team turned to MongoDB for its high scalability and ease of development.

Why MongoDB

Urber is what’s known as a ‘document handling platform’. In development terms, it is classical CRUD (create, read, update, delete) without much of the D. The central data entity for us is an article, which aligns well with the MongoDB philosophy and how it models with data.

Although there are a number of related data entities to an article (for example, comments, loves, reposts), these are most frequently needed along with the rest of the article data, as that’s when social data becomes really powerful.

For instance, if you're reading about a new restaurant then you will want to know how many stars it received in a review. You may also be interested in its geographical nearness to you and if anyone in your network has eaten there. This ability to easily connect information that makes MongoDB’s document object model a fit for social media platforms, and our articles in particular. We no longer need a more traditional relational database.

Flexible Working

Flexibility is a key ingredient for success in the life of a startup or indeed any business that relies on rapidly evolving technology.

In my experience, flexibility in developing and evolving the application’s data model has been highly desirable but also rather difficult to manage. As document oriented databases have matured, capabilities are definitely changing. MongoDB has shown that much of that work can be effectively removed, so we can build applications faster and continuously innovate.

Our development team is able to keep pace with the changing data needs of the evolving platform thanks largely to MongoDB. The ability to augment data structures without the overhead of maintaining relational data structures has been key. It makes the development team’s life simple, which means we can focus on the important task of growing the business.

How MongoDB helps us scale

Our goal is to emulate the success of other social media platforms such as Twitter or Tumblr. A huge undertaking but we truly believe that we have the potential to achieve it and we need technology that can get us there. In the past quarter we’ve seen a year on year increase of 70% in users and more than 100% growth in content.

Twitter Integration

We have a close integration with Twitter. On Urber, users can tag Twitter handles in their articles and mention people or places they are writing about, as well as share t links automatically. MongoDB handles the unstructured social media data that Twitter produces seamlessly.

The goal of Urber is to provide readers with insider knowledge. We’re creating an experience and we hope to be the it place for city news, stories and inspiration. Establishing a start-up is always difficult, but one thing we’ve not lost sleep over is whether we have the right technology stack to support us. MongoDB is helping Urber expand in ways we couldn’t even imagine when we started.

To see how organizations around the world are building applications never before possible, read our Quantifying the Value of Database Selection white paper:

READ QUANTIFYING THE VALUE OF DATABASE SELECTION

Retail Reference Architecture Part 3: Query Optimization and Scaling

$
0
0

In part one of this series on reference architectures for retail, we discussed how to use MongoDB as the persistence layer for a large product catalog. In part two, we covered the schema and data model for an inventory system. Today we’ll cover how to query and update inventory, plus how to scale the system.

Inventory Updates and Aggregations

At the end of the day, a good inventory system needs to be more than just a system of record for retrieving static data. We also need to be able to perform operations against our inventory, including updates when inventory changes, and aggregations to get a complete view of what inventory is available and where.

The first of these operations, updating the inventory, is both pretty straightforward and nearly as performant as a standard query, meaning our inventory system will be able to handle the high-volume we would expect to receive. To do this with MongoDB we simply retrieve an item by its ‘productId’, then execute an in-place update on the variant we want to update using the $inc operator:

For aggregations of our inventory, the aggregation pipeline framework in MongoDB gives us many valuable views of our data beyond simple per-store inventory by allowing us to take a set of results and apply multi-stage transformations. For example, let’s say we want to find out how much inventory we have for all variants of a product across all stores. To get this we could create an aggregation request like this:

Here, we are retrieving the inventory for a specific product from all stores, then using the $unwind operator to expand our variants array into a set of documents, which are then grouped and summed. This gives us a total inventory count for each variant that looks like this:

Alternatively, we could have also matched on ‘storeId’ rather than ‘productId’ to get the inventory of all variants for a particular store.

Thanks to the aggregation pipeline framework, we are able to apply many different operations on our inventory data to make it more consumable for things like reports and gain real insights into the information available. Pretty awesome?

But wait, there’s more!

Location-based Inventory Queries

So far we’ve primarily looked at what retailers can get out of our inventory system from a business perspective, such as tracking and updating inventory, and generating reports, but one of the most notable strengths of this setup is the ability to power valuable customer-facing features.

When we began architecting this part of our retail reference architecture, we knew that our inventory would also need to do more than just give an accurate snapshot of inventory levels at any given time, it would also need to support the type of location-based querying that has become expected in consumer mobile and web apps.

Luckily, this is not a problem for our inventory system. Since we decided to duplicate the geolocation data from our stores collection into our inventory collection, we can very easily retrieve inventory relative to user location. Returning to the geoNear command that we used earlier to retrieve nearby stores, all we need to do is add a simple query to return real-time information to the consumer, such as the available inventory of a specific item at all the stores near them:

Or the 10 closest stores that have the item they are looking for in-stock:

Since we indexed the ‘location’ attribute of our inventory documents, these queries are also very performant, a necessity if the system is supporting the type of high-volume traffic commonly generated by consumer apps, while also supporting all the transactions from our business use case.

Deployment Topology

At this point, it’s time to celebrate, right? We’ve built a great, performant inventory system that supports a variety of queries, as well as updates and aggregations. All done!

Not so fast.

This inventory system has to support the needs of a large retailer. That means it has to not only be performant for local reads and writes, it must also support requests spread over a large geographic area. This brings us to the topic of deployment topology.

Datacenter Deployment

We chose to deploy our inventory system across three datacenters, one each in the west, central and east regions of the U.S. We then sharded our data based on the same regions, so that all stores within a given region would execute transactions against a single local shard, minimizing any latency across the wire. And lastly, to ensure that all transactions, even those against inventory in other regions, were executed against the local datacenter, we replicated each all three shards in each datacenters.

Since we are using replication, there is the issue of eventual consistency should a user in one region need to retrieve data about inventory in another region, but assuming a good data connection between datacenters and low replication-lag, this is minimal and worth the trade-off for the decrease in request latency, when compared to making requests across regions.

Shard Key

Of course, when designing any sharded system we also need to carefully consider what shard key to use. In this case, we chose {storeId:1},{productId:1} for two reasons. The first was that using the ‘storeId’ ensured all the inventory for each store was written to the same shard. The second was cardinality. Using ’storeId’ alone would have been problematic, since even if we had hundreds of stores, we would be using a shard key with relatively low cardinality, a definite problem that could lead to an unbalanced cluster if we are dealing with an inventory of hundreds of millions or even billions of items. The solution was to also include ‘productId’ in our shard key, which gives us the cardinality we need, should our inventory grow to a size where multiple shards are needed per region.

Shard Tags

The last step in setting up our topology was ensuring that requests were sent to the appropriate shard in the local datacenter. To do this, we took advantage of tag-aware sharding in MongoDB, which associates a range of shard key values with a specific shard or group of shards. To start, we created a tag for the primary shard in each region:

Then assigned each of those tags to a range of stores in the same region:

In a real-world situation, stores would probably not fall so neatly into ranges for each region, but since we can assign whichever stores we want to any given tag, down to the level of assigning a single storeId to a tag, it allows the flexibility to accommodate our needs even if storeIds are more discontinuous. Here we are simply assigning by range for the sake of simplicity in our reference architecture.

Recap

Overall, the process of creating our inventory system was pretty simple, requiring relatively few steps to implement. The more important takeaway than the finished system itself is the process we used to design it. In MongoDB, careful attention to schema design, indexing and sharding are critical for building and deploying a setup that meets your use case, while ensuring low latency and high performance, and as you can see, MongoDB offers a lot of tools for accomplishing this.

Up next in the final part of our retail reference architecture series: scalable insights, including recommendations and personalization!

Learn More

To discover how you can re-imagine the retail experience with MongoDB, read our white paper. In this paper, you'll learn about the new retail challenges and how MongoDB addresses them.

To find out how MongoDB’s consulting team can get your app off the ground faster, explore our Rapid Start engagement.

LAUNCH YOUR APP FASTER

<< Read Part 2

How to Avoid a Malicious Attack That Ransoms Your Data

$
0
0

Recently, there have been reports of malicious attacks on unsecured instances of MongoDB running openly on the internet. The attacker erased the database and demanded a ransom be paid before restoring it.

If you believe your database was attacked, see these suggested steps.

These attacks are preventable with the extensive security protections built into MongoDB. You need to use these features correctly, and our security documentation will help you do so. Here are pointers to the relevant documentation and other useful resources:

  • Security is addressed in detail in our Security Manual. We also recently expanded our online training on security as part of the MongoDB University curriculum.

  • Follow the steps in our Security Checklist. It discusses enforcing authentication, enabling access control, limiting network exposure, and other important best practices.

  • The most popular installer for MongoDB (RPM) limits network access to localhost by default. Use this configuration too if you’re installing via another means.

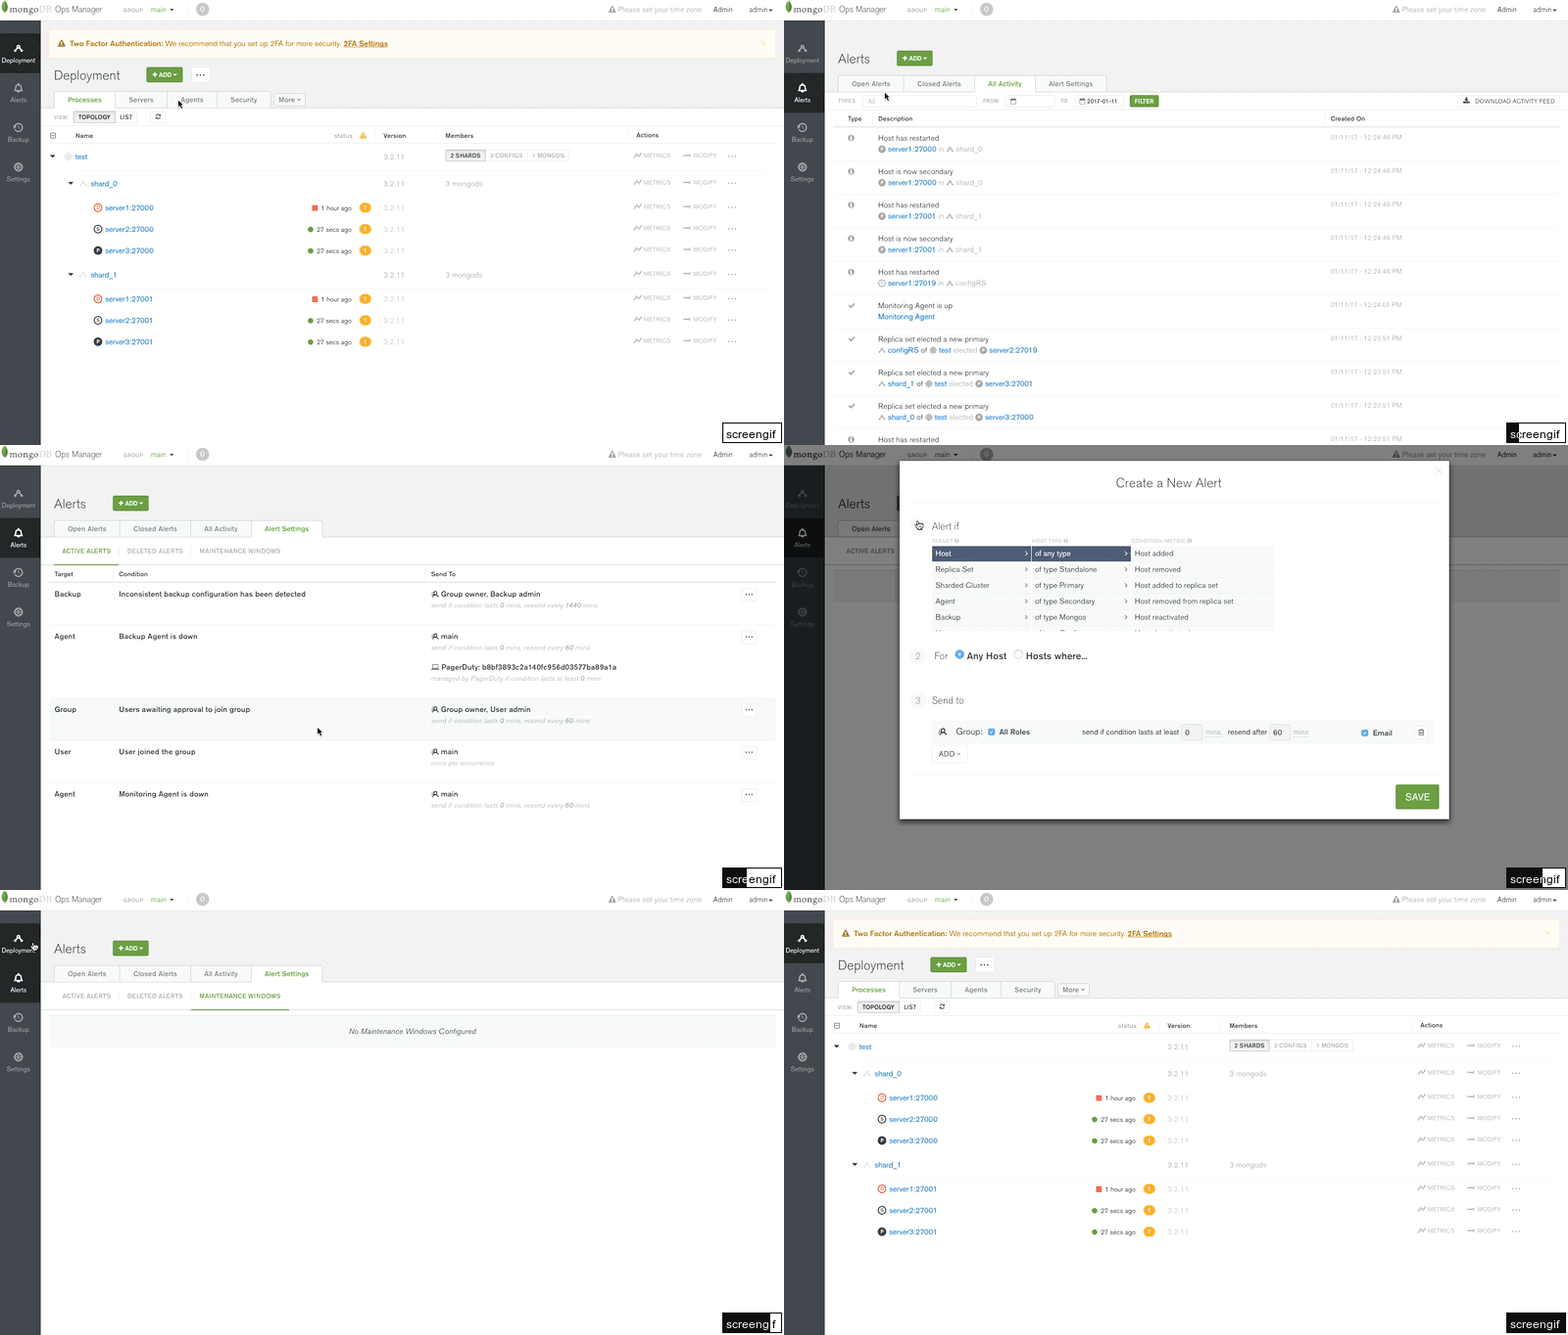
  • MongoDB Cloud Manager and MongoDB Ops Manager provide continuous backup with point in time recovery, and users can enable alerts in Cloud Manager to detect if their deployment is internet exposed (see Figure 1 below).

Figure 1: Create a new alert to notify you if a host is exposed to the public internet.


  • The latest MongoDB 3.4 release enables you to configure authentication to an unprotected system without incurring downtime.

  • The MongoDB Atlas hosted database service provides multiple levels of security for your database out of the box. These include robust access control, network isolation using Amazon VPCs and VPC Peering, IP whitelists, encryption of data in-flight using TLS/SSL, and optional encryption of the underlying filesystem at-rest.

  • We encourage users who have experienced a security incident with MongoDB to create a vulnerability report. Instructions on how to do this, or to contact us, are provided here.

  • If you are interested in learning more about security best practices, please read our Security Architecture White Paper or visit our Security Hub.

Suggested Steps To Diagnose and Respond to an Attack

How can you tell if an attacker has compromised your data?

  • If access control is configured correctly for the database, attackers should not have been able to gain access to your data. Review our Security Checklist to help catch potential weaknesses.
  • Verify your databases and collections. In the recent cases we’ve seen, the attacker has dropped databases and/or collections and replaced them with a new one with a ransom demand.
  • If access control is enabled, audit the system logs for unauthorized access attempts or suspicious activity.

If you were running an unsecured instance of MongoDB that has been compromised:

  • If you are a commercial support customer, file an S1 case ASAP and our Technical Services Engineers can guide you through the process below.
  • Your first priority should be securing your cluster(s) to prevent further unauthorized access. Follow the steps in our Security Checklist.
  • If you had pre-existing users on the system, verify that no users have been added, removed, or modified by running the usersInfo command.
  • Examine logs to find the time of the attack. Look for commands that dropped your data, modified users, or created the ransom demand record.
  • If you take regular backups of the compromised database, you can restore the most recent backup; you will have to evaluate what data may have changed between the most recent backup and the time of the attack. If you use Ops Manager or Cloud Manager for backup, you may be able to perform a point-in-time restore to immediately before the attack. Check whether you are still within the time window for point-in-time restore (the last 24 hours, unless you have configured it otherwise). If so, ensure you perform the restore before the PIT window elapses. If you are past the PIT window, you will still be able to restore a recent backup.
  • If you don’t have a backup or are otherwise unable to restore the data, unfortunately your data may be permanently lost.
  • You should assume that the attacker has a copy of all data from the affected database(s). Follow your internal security procedures for a data breach.
  • Finally, refer to our security best practices and resources to protect your data in the future.


About the Author - Andreas Nilsson

Andreas is the Director of Product Security at MongoDB. Prior to joining MongoDB, Andreas was a Security Architect at NASDAQ OMX responsible for the security architecture of the trading systems. Past employment includes Check Point Software Technologies and Certezza. Andreas holds an MS degree in Computer Security from Columbia University and an MS degree in Engineering Physics from KTH Stockholm.

Why the Diversity Scholars Loved MongoDB World

$
0
0

Hi MongoDB Community Members!

Thinking about applying for a Diversity Scholarship for MongoDB World? You should! As a recipient, you get complimentary admission to the biggest, most fun gathering of the MongoDB community, but that’s not all. The full award includes:

  • Complimentary admission to a pre-conference workshop of your choice
  • Invitation to two lunch sessions with other Scholars
  • Speed mentoring with MongoDB speakers at the event
  • A MongoDB certification voucher
  • Three-month access to on-demand MongoDB University courses
  • Lifelong membership in the online MongoDB Diversity Scholars community
  • A feature in a blog post

Attending MongoDB World 2017 on a Diversity Scholarship has benefits that reach far beyond the award package. But don’t take my word for it! See what the MongoDB World 2016 Diversity Scholars found most valuable about attending the conference:

Jeffrey Derose, Founder, JD Web Services - Staten Island, NY

“MongoDB World was a great experience. I really enjoyed meeting all the talented people at the event. So many people from different walk of life – it was a great learning experience and great for networking. I enjoyed the startup showcase the most. Learning about all the different ways that people are using MongoDB and how it's helping their businesses and products was great. The after party was fun as well. It's nice to know the people at MongoDB know how to party, as well as build amazing technology.”

Lina Lora, Software Engineer - Colombia

“My favorite part of MongoDB World was the pre-conference workshop because you get to practice, learn from an expert, and ask him questions. Also networking and listening to the knowledgeable speakers at the sessions was a very interesting experience.”

Mwai Karimi, Junior Software Developer at SSGC - Swindon, UK

“My favorite part of the conference was interacting with the fellow scholarship recipients and also engaging with the women who were representing at the Women and Trans Coders lounge. I left feeling motivated and encouraged. Moreover, the keynote sessions were really impressive. I learned a lot.”

Carol Gonzalez, Adjunct Professor at Lehman College - Bronx, NY

“Learning different ways to solve problems from the MongoDB engineers, and seeing how other companies implemented MongoDB in their growing businesses was an eye opener. It’s rare to find women who have a passion for coding, but in the Women and Trans Coders Lounge I had the pleasure to meet many women who I felt a connection with. And the after party was a great way to unwind with great music and food, and make great networking connections. All of this made MongoDB World an extremely valuable learning experience.”

May Mascenik, Engineer/Program Manager at ITP - Los Angeles, CA

“Every single staff member I met at MongoDB World was so kind, friendly, and open-minded. I left the conference feeling encouraged to implement my ideas with MongoDB. I highly recommend attending MongoDB World!”

Krystal Flores, Data Services Engineer at Twine Data - Los Angeles, CA

“The MongoDB World 2016 Diversity Scholars cohort consisted of 4/10 Latina programmers. This is the biggest percentage of Latinxs in tech I have ever seen. My favorite session was Baidu’s: they have massive data sets and are working directly with MongoDB to improve the future of the database's capabilities with large data including ideographic languages.”

Sabber Ahamed, Graduate Research Assistant at CERI - Memphis, TN

“My favorite part of the MongoDB world was Ask the Experts. This is where I got great ideas for my work. I also loved meeting the other MongoDB Diversity Scholarship recipients. They are simply awesome. I wish to see them again.”


The deadline for the MongoDB World 2017 Diversity Scholarship is March 31, 2017. Apply today to make sure you’re considered for the award.

Apply now

Can’t wait to see your submissions!

CIDR Subnet Selection for MongoDB Atlas

$
0
0

One of the best features of MongoDB Atlas is the ability to peer your host VPC on your own Amazon Web Services (AWS) account to your Atlas VPC. VPC peering provides you with the ability to use the private IP range of your hosts and MongoDB Atlas cluster. This allows you to reduce your network exposure and improve security of your data. If you chose to use peering there are some considerations you should think about first in selecting the right IP block for your private traffic.

NOTE - As of the writing of this post, AWS standards require both VPCs to be located in the same AWS region. Example: You can peer us-east-1 VPCs to other us-east-1 VPCs, but you cannot peer a us-east-1 VPC to a us-west-2 VPC.

Host VPC

The host VPC is where you configure the systems that your application will use to connect to your MongoDB Atlas cluster. AWS provides your account with a default VPC for your hosts You may need to modify the default VPC or create a new one to work alongside MongoDB Atlas. Regardless of your use case, it's important to ensure a few basics when configuring your host VPC:

  • Host VPC must be in the same region as your Atlas Cluster

  • Use a RFC-1918 private IP Range

MongoDB Atlas requires your host VPC follow the RFC-1918 standard for creating private ranges. The Internet Assigned Numbers Authority (IANA) has reserved the following three blocks of the IP address space for private internets:

| 10.0.0.0 - 10.255.255.255 (10/8 prefix) |
| 172.16.0.0 - 172.31.255.255 (172.16/12 prefix) |
| 192.168.0.0 - 192.168.255.255 (192.168/16 prefix) |

  • Don't overlap your ranges!

The point of peering is to permit two private IP ranges to work in conjunction to keep your network traffic off the public internet. This will require you to use separate private IP ranges that do not conflict.

AWS standard states the following in their "Invalid VPC Peering" document:

"You cannot create a VPC peering connection between VPCs with matching or overlapping IPv4 CIDR blocks."

Cannot create a VPC peering connection between VPCs with matching or overlapping IPv4 CIDR blocks

MongoDB Atlas VPC

When you create a group in MongoDB Atlas, by default we provide you with an AWS VPC which you can only modify before launching your first cluster. Groups with an existing cluster CANNOT MODIFY their VPC CIDR block– this is to comply with the AWS requirement for peering. By default we create a VPC with IP range 192.168.248.0/21. To specify your IP block prior to configuring peering and launching your cluster, follow these steps:

  1. Sign up for MongoDB Atlas and ensure your payment method is completed.
  2. Click on the SECURITY tab, then select PEERING. You should see a page such as this which shows you that you have not launched a cluster yet: Create new peering connection
  3. Click on the New Peering Connection button. You will be given a new "Peering Connection" window to add your peering details. At the bottom of this page you'll see a section to modify "Your Atlas VPC" Modify your Atlas VPC
  4. If you would like to specify a different IP range, you may use one of the RFC-1918 ranges with the appropriate subnet and enter it here. It's extremely important to ensure that you choose two distinct RFC-1918 ranges. These two cannot overlap their subnets: Choose two distinct RFC-1918 ranges
  5. Click on the INITIATE PEERING button and follow the directions to add the appropriate subnet ranges.

Conclusion

Using peering ensures that your database traffic remains off the public network. This provides you with a much more secure solution allowing you to easily scale up and down without specifying IP addresses each time, and reduces costs on transporting your data from server to server. At any time if you run into problems with this, our support team is always available by clicking the SUPPORT icon in the lower left of your window. Our support team is happy to assist in ensuring your peering connection is properly configured.


About the Author - Jay Gordon

Jay is a Technical Account Manager with MongoDB and is available via our chat to discuss MongoDB Cloud Products at https://cloud.mongodb.com.


Providing Least Privileged Data Access in MongoDB

$
0
0

Many years ago I took a semester off from college and worked as a software developer intern for a consulting company. To protect the innocent I won't reveal the names and you can't find any information about this time on my LinkedIn profile so don't bother checking. The reason I mentioned this point in my life is my job at that consulting company was working with a major manufacturer on their financial reporting system. My job you ask? To write the security component. Yes, I as the intern was given the responsibility of writing the component to handle the authentication and authorization of the entire application. After all, security is an afterthought of the software development process.

Fast forward a few decades and look at how times have changed! I don't believe that consulting company is around anymore and I hope that the application they wrote has been upgraded a few times since my work on it. Today threats are everywhere and quality software vendors put security code reviews as a release criteria to ship their product. The team behind MongoDB, the world's fastest growing database is no different in their approach to security, and this is why you see security enhancements like read-only views in their latest MongoDB 3.4 release.

A Word from our Sponsor!

Of course, no article on security is complete without reminding readers of one critical fact – before you go into production with your new MongoDB-based application, enable access control! Its quick and straightforward - the MongoDB Security Checklist steps you through what you need to do

What are Read-only Views?

Read-only views (ROV) are a similar concept to table views found in relational databases. They enable administrators to define a query that is materialized at runtime. ROVs do not store data and are considered first class objects in MongoDB. Being first class objects allows administrators to define permissions on who can access the views. ROVs become a separation layer between the data itself and the user. This is one of the biggest benefits of the feature: Users accessing the view do not need access to the underlying data the view is referencing. In addition it is important to note that since the view does not store data, as the source data changes so does the results of the view, so developers don’t need to concern themselves with working around the issues imposed by eventual consistency, such as returning stale or deleted data.

Why are read-only views (ROV) and security mentioned in the same sentence?

From a security standpoint think of the scenario where you have a customer service web application that queries for customer information. The database the application is using contains more information than the customer service representative needs such as social security numbers, and other sensitive information. At first glance you may think this is an easy problem to solve, just make sure the queries that the web application is submitting to the database does not request those sensitive fields. On paper this works and if everyone were honest the world would be a peaceful place and my article would be very short. However, there are some people that want to exploit this flawed assumption.

Imagine that we stick with this design where the credentials that the web application is using to connect to the database has direct access to the appropriate tables/collections. If an attacker compromised our web application they could be allowed to make a connection to our database. Once connected they could make their own ad-hoc queries and return the sensitive information that is contained in the database since the web application credentials has the appropriate access to the data. To mitigate this security issue there are different solutions depending on the database platform you are using. For example, within MongoDB you could have a job that copies just the key pieces of data into a new collection and give the web application just access to that collection, but this introduces moving parts in the application and the database. In the end you will find that read-only views make these work arounds redundant. At a high level our security issue can be mitigated using MongoDB's ROVs as follows:

  • Create a view that contains an aggregation query on the data you wish to obtain
  • Create a role that has "find" permission on the view
  • Create or grant a user access to the role

The following is a step by step example on leveraging ROVs as a separation between a user and the data.

Example: Securing a customer service web application using MongoDB's Read-only Views To walk through this example you will need a MongoDB instance available. To download the latest version of MongoDB go to https://www.mongodb.com/download-center.

For help on installing MongoDB go to https://docs.mongodb.com/manual/installation/.

For purposes of this demonstration the MongoDB instance does not need to be configured in any special way, such as configuring a replica set or enabling sharding. A simple out of the box instance of MongoDB running is acceptable. For this example I created a new folder called, "ROVExample" and started the mongod process which will use the default port of 27017. If you wish to use a different port you may specify it with the "--port" parameter.

Command Prompt> mkdir ROVExample

Command Prompt> mongod --dbpath ROVExample

.......
2017-01-04T09:32:23.190-0500 I INDEX    [initandlisten] build index done.  scanned 0 total records. 0 secs
2017-01-04T09:32:23.190-0500 I COMMAND  [initandlisten] setting featureCompatibilityVersion to 3.4
2017-01-04T09:32:23.191-0500 I NETWORK  [thread1] waiting for connections on port 27017

At this point we have an instance of MongoDB running and waiting for our connections. Now we want to enable MongoDB to use authentication via traditional usernames and passwords. There are other authentication mechanisms such as X.509 certificates and leveraging LDAP. For more information on these other mechanisms check out the docs on MongoDB authentication. . To enable authentication with MongoDB we must first connect to our MongoDB instance and create an administrator user. In the below snippet we are connecting to our MongoDB instance via the Mongo Shell command line tool. Next we are switching to the ADMIN database and using the db.createUser() function to create a user that is an administrator.

Command Prompt> mongo

...
(mongod-3.4.0) test> use admin
switched to db admin

(mongod-3.4.0) admin> db.createUser(
    {
    user: "theadmin",
    pwd: "pass@word1",
    roles: [ { role: "root", db: "admin" } ]
    }
    )

Upon successful execution of the command you will get a message like this one:

Successfully added user: {
  "user": "theadmin",
  "roles": [
    {
      "role": "root",
      "db": "admin"
    }
  ]
}

Now that we have created the admin account we need to stop the MongoDB service and restart it with the "--auth" switch which tells MongoDB to require authentication. Note, if we were running a replica set, we could instead use a rolling restart as we enable authentication across the cluster, thus avoiding any service interruption

Command Prompt> mongod --dbpath ROVExample --auth
...
2017-01-04T09:52:32.713-0500 I CONTROL  [initandlisten] options: { security: { authorization: "enabled" }, storage: { dbPath: "ROVExample" } }
...
2017-01-04T09:52:33.355-0500 I NETWORK  [thread1] waiting for connections on port 27017

Now log in to MongoDB with the account we just created. We do this by passing the credentials and a parameter called, "--authenticationDatabase" which tells MongoDB where the user credentials for the given user are stored. Since we created the user in the admin database we will connect to MongoDB using the shell as follows:

Command Prompt>mongo --authenticationDatabase=admin -u theadmin -p pass@word1

MongoDB shell version v3.4.0
connecting to: mongodb:https://www.linkedin.com/redir/invalid-link-page?url=%2F%2F127%2e0%2e0%2e1%3A27017
...
MongoDB Enterprise >

We are now ready to create some sample data to use with this demonstration. A complete discussion of enabling authentication in MongoDB is available in the online documentation.

Side Note: When you supply a password on the command line for any application, including our example above, remember that anything you type is available in a command line history. For example, if you're on a linux platform, just type, "history" on the command line to see. If you are paranoid or connecting to your production database try launching the shell with just the "mongo --authenticationDatabase=admin" then once connected use the db.auth() command as follows:

MongoDB Enterprise > use admin
switched to db admin

MongoDB Enterprise > db.auth('root','pass@word1')
1
MacBook-Pro-121(mongod-3.4.0) admin>

Inserting Sample Data

In this example we will be inserting a simple document that contains both fields a customer service web application might use (i.e. first name, last name, and address) and some data that is related to a customer but is sensitive (i.e. social security number, date of birth, etc).

MongoDB Enterprise > use FooBarFinancial

switched to db FooBarFinancial

MongoDB Enterprise > db.Customers.insert(
 { first_name: "Rob", last_name: "Walters",
   SSN: "123-45-6789", DOB: "01/01/1996",
   address_line_1: "123 Main St.", city: "Boston", state: "MA" } )

(Yes I am 21, at least that's what I keep telling myself.. )

Side Note: The best practice is you only want to give users the least permission they need to do their job. In a production environment we may want to craft special custom roles that only do the tasks the users need. In some cases like this one where we are in a development/test environment I am ok with using a superuser role like ROOT. There are a few roles that are considered "superusers". These roles can elevate themselves and special care should be taken when using them. Be sure to audit your MongoDB instance to keep honest people honest. For more information on the superuser roles see the build-in roles section of the MongoDB online documentation.

At this point we have created the "FooBarFinancial" database and added a document to the Customers collection. If you perform a simple Find statement you can verify as follows:

MongoDB Enterprise > db.Customers.find()
{
  "_id": ObjectId("586d1b6680ca46840069e50b"),
  "first_name": "Rob",
  "last_name": "Walters",
  "SSN": "123-45-6789",
  "DOB": "01/01/1996",
  "address_line_1": "123 Main St.",
  "city": "Boston",
  "state": "MA"
}

Side Note: If you are not familiar with MongoDB you may notice a new field called, "_id" that we didn't add when we created the document. In MongoDB every document needs to have a unique field called, "_id". Although you can specifically provide one, if you don't you will get one created for you in the form of what looks like a Globally Unique ID (GUID). This GUID contains a timestamp of the creation time. You can see this yourself by simply copying and pasting in the ObjectId value and a .getTimestamp() command as follows:

MongoDB Enterprise > ObjectId("586d1b6680ca46840069e50b").getTimestamp()*

ISODate("2017-01-04T15:57:26Z")

Creating the view

At this point we are ready for our first step in the solution, configuring the view. Read-only Views (ROV) as mentioned previously are materialized at run-time and thus store no actual data. To create one we will go to the "FooBarFinancial" database and create the view as follows:

MongoDB Enterprise > db.createView("ViewCustomers", "Customers",
 [
   { $project:
      { first_name: 1,
        last_name: 1,
        address_line1: 1,
        city: 1,
        state: 1
      }
   }
 ] )

The first argument is the name of the view, followed by the collection the view will be using, followed by the aggregation query we are looking to execute to retrieve our data. In this example we have a very simple aggregation query that just uses $project to return the 5 keys. Note that the "1" value means include this column, we could have also listed the other keys and said, "0" which means do not include. For additional reading on the aggregation pipeline please check out the following URL: https://docs.mongodb.com/manual/core/aggregation-pipeline/.

Once we created this view if you issue a query in the MongoDB shell (show collections) you will see that two new collections were created in the FooBarFinancial database: system.views and ViewCustomers. System.views stores the metadata for the views defined in the collection and ViewCustomers is our read-only view presented to us as a collection. Why does my ROV appear as a collection? This allows us as administrators to define access on this view.

Creating user-defined roles

Rather than give a specific user specific access to a specific resource, we want to avoid management headaches by grouping access privileges into roles. We can then grant access to these roles to the users themselves. Let's create the "CustomerServiceQuery" role and give it "find" permissions on the "ViewCustomers" view we just created.

MacBook-Pro-121(mongod-3.4.0) FooBarFinancial> use admin
switched to db admin

MacBook-Pro-121(mongod-3.4.0) admin> db.createRole(
 { role: "CustomerServiceQuery",
 privileges: [
    { resource:
       { db: "FooBarFinancial", collection: "ViewCustomers"},
         actions: ["find"] } ],
      roles:[]
     } )

Next, we will create a new user for our web application to use called, "webuser" using the createUser function:

MacBook-Pro-121(mongod-3.4.0) admin> db.createUser(
{ user: "webuser",
 pwd: "pass@word1",
 roles: [ { role: "CustomerServiceQuery", db: "admin" } ] } )

Now we are ready to test our new user's access to the data!

Querying the view with our new minimal privilege user

On a new window connect to MongoDB via the Mongo shell as follows:

Command Prompt> mongo --authenticationDatabase=admin -u webuser
-p pass@word1

MongoDB shell version v3.4.0
connecting to: mongodb:https://www.linkedin.com/redir/invalid-link-page?url=%2F%2F127%2e0%2e0%2e1%3A27017
MongoDB server version: 3.4.0
...
MongoDB Enterprise >

Note that we are connecting to MongoDB and specifying the admin database as our authentication database. This is because the admin database is where we created webuser. We could have also created the user in the FooBarFinancial database and used that as a authenticationDatabase. It is a best practice to leverage the admin database for user accounts. Now that we have authenticated notice that you as the webuser can't do much of anything. This user has no permissions other than executing the view which we gave them permission to do. For example, try viewing the databases via the "show dbs" command:

MongoDB Enterprise > show dbs
2017-01-04T12:16:59.399-0500 E QUERY    [main] Error: listDatabases failed:{
  "ok": 0,
  "errmsg": "not authorized on admin to execute command { listDatabases: 1.0 }",
  "code": 13,
  "codeName": "Unauthorized"
} :

Now, drum roll please... our web application needs to get access to our customers so they simply query the view as follows:

MongoDB Enterprise > use FooBarFinancial
switched to db FooBarFinancial
MongoDB Enterprise > db.ViewCustomers.find()
{
  "_id": ObjectId("586d2b17305dabd49d2c9417"),
  "first_name": "Rob",
  "last_name": "Walters",
  "city": "Boston",
  "state": "MA"
}

And there you have it all the sensitive info stripped and just the information the customer service web application needs. If an attacker compromised the webuser account or the web page they might be able to connect to MongoDB but all they would have access to is the information stored in this view.

Side Note: You may notice on the MongoDB shell an error following the execution of this query. Something with the text, "not authorized on FooBarFinancial to execute command { profile: -1.0 }". When we execute a query using the MongoDB shell it returns a cursor and some information like how many milliseconds the query took. This profile information requires yet another permission in order to be obtained and thus presents the error that you see. It is specific in this case to using the MongoDB shell in our example.

Some considerations when using read-only views

  • When a view is queried MongoDB will materialize the view with the latest values from the underlying collection. For example, consider the scenario where a customer address view is queried at time T0. At time T1, the customer address is updated. At time T2 the view is queried again and the results now reflect the latest value of the customer address.
  • Views can reference other views. They do not always have to reference a collection.
  • Indexes can't be created on views. However, they can be created on the underlying collections that the views are referencing.

Conclusion

The world is insecure and today more than ever we as application developers and administrators need to think of the security implications of everything we deploy. The developers at MongoDB think no different and with the recent release of 3.4 provide another security related feature called Read-only Views(ROV). ROVs provide a way for administrators to separate access to the underlying data from the user requesting the data. This feature supports the principle of least privileged software architecture.

You can learn more about MongoDB read-only views from the documentation.

Download the MongoDB Security Reference Architecture Guide


About the author: Robert Walters is a Senior Solutions Architect at MongoDB based in the Boston, Massachusetts area. Robert has spent almost 20 years working with database technologies and authored many technical books and whitepapers. In addition he has co-authored three patents while working on the SQL Server product team at Microsoft.

Escape the Room, Meet the Drivers Team, and More at MongoDB World

$
0
0

When you go to a conference, your goal is to get actionable advice to bring back to your team – and have a great time doing it! At MongoDB World 2017, alongside the 80+ technical and interactive sessions we’re planning, we have a number of fun programs that can help you get the most out of your two days of MongoDB education. Here’s what we’re brewing for the event:

MongoDB’s Escape the Room

Many of you have heard of Escape the Room challenges – and some have you might be talented escapers. At MongoDB World, we’ll be testing your knowledge with the Escape the Room Challenge.

How does it work? Groups of 2-6 people can sign up to play. You will be locked in a room and given 10-15 min to solve 4 riddles in order to escape the room. All riddles will be based on MongoDB 3.4 features and will require the group to work together; refresh your knowledge so you can escape in record time! The free M034 course at MongoDB University will walk you through all of the updates in MongoDB 3.4.

The Sharding Game: Are You Smarter Than a MongoDB Engineer?

How well do you know MongoDB? See if you can beat MongoDB engineers and fellow conference attendees in a multiple choice, multiplayer game. You’ll be ranked on knowledge as well as speed.

Drivers Rooms

MongoDB officially supports 11 open source database drivers: C, C++, C#, Java, Motor, Node, Perl, PHP, Python, Ruby and Scala. A select group of driver engineers will present on the latest MongoDB driver developments at MongoDB World. Each driver session will begin with a brief presentation about the state of the driver, followed by a peek into our roadmap, followed by Q&A. Your input and feedback will be used to create the roadmap for new features and improvements in the drivers.

Hands-on Labs

You’ll be learning a lot on-site at MongoDB World. We want to make more learning opportunities available with our hands-on labs and robo-learning tools, so you can interactively learn new tips and tricks for developing and managing MongoDB applications.

Ask the Experts

Bring your toughest MongoDB questions to the event, because you’ll be able to talk to a MongoDB expert one-on-one at the Ask the Experts booth. An expert can help you whiteboard solutions to your most pressing problems and give you more insight into how MongoDB can help you in your current and upcoming projects.

We’re excited to see you there and help you with two days of hands-on learning. Register before March 3 to pay only $299 for full conference tickets!

Register today!


How to Use MongoDB Atlas in API Integration Services

$
0
0

MongoDB Atlas, our fully-managed MongoDB as a service, allows organizations to take advantage of the database without having to worry about the operational overhead of managing a distributed system. For developers that seek to integrate the underlying database programmatically with tools or development platforms they're already using, Atlas also provides a full-featured API. We covered how to work with the MongoDB Atlas API from the command line in a recent blog post; today we're going to explore using the API with 3rd party API integration services, sometimes referred to as online workflows or serverless API frameworks.

We have partnered with a number of vendors in this space to allow users to take advantage of Atlas and MongoDB features from within their favored development environments. This blog will provide overviews and walkthroughs of 2 integrations with API integration platforms: Stamplay and Built.io.

Getting started with MongoDB Atlas

To get started, you will need a MongoDB Atlas account. If you don’t have one already, feel free to sign up for one here.

MongoDB Atlas Sign Up or Log In

Once you have an account, you will see the main "MongoDB Atlas Clusters" screen which we will ignore as we will be programmatically creating our clusters as shown below.

MongoDB Atlas Clusters

Click on Settings>Account and copy the User Name in the Profile section (note this may or may not be set to your email address):

MongoDB Atlas Settings

Click on Settings>Public API Access and click on the Generate button:

MongoDB Atlas API Access

Assign a name to the key. After the key is generated, be sure to jot it down because this is the only time that the UI will display it in full:

MongoDB Atlas API Access

The user name and API key values are all you need to connect your API integration tools to MongoDB Atlas.

Stamplay integration with MongoDB Atlas

Stamplay is an integration platform for creating new services by combining existing ones, often with little code required. It allows users to integrate, mix, and match APIs to create new services and automate processes thanks to 80+ cloud connectors and out of the box APIs for data storage, webhooks, NodeJS runtime, user authentication and hosting. Stamplay allows users to trigger workflows either based on events in your MongoDB Atlas cluster or with devops meta-scripts.

The following walkthrough describes the easiest way to use Stamplay to spin up a new MongoDB Atlas cluster, add an IP to the IP whitelist, create new database users and the database itself in the cluster, and finally creating a Slack notification when the cluster is ready. Stamplay supports a wide range of other popular APIs such as Sendgrid, Twilio, Box, and more.

Getting started with Stamplay

Visit stamplay.com to get started:

Get started with Stamplay

After you have signed up and logged in, you will be able to view your projects:

Log In to Stamplay

Click the [+] button and select “USE A BLUEPRINT” to use a sample MongoDB Atlas cluster deployment blueprint with Slack notifications:

Sample Atlas cluster deployment blue with Slack notification

In the following screen, you can see a number of blueprints, including the MongoDB autopilot API, which allows you to create a MongoDB cluster in Atlas and get a notification when it's available in Slack. Select it by clicking the “GET IT” button associated:

Create a MongoDB cluster in Atlas

Name project

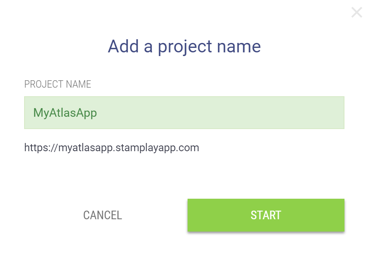
As you can see, Stamplay assigns your project a new unique endpoint with a public URL. In the next screen, follow along in the wizard to complete your blueprint. Name your project and click “START”:

MongoDB Atlas autopilot API

Click “NEXT” and paste the previously saved user name and API key into the following fields:

Enter user namename and API key

Then click “CONNECT” and if everything was configured correctly, the connection with MongoDB Atlas will be established. Click “CONNECT” in the Slack section and choose your Slack account in the pop-up (or select the "Create a new team" link and then choose a new team to sign up for one"). After signing in with Slack, click the Authorize button to let Stamplay access your Slack account.

Select your Slack Account

Click “NEXT”.

MongoDB cluster configuration in Stamplay

Now it’s time to configure the cluster when you trigger this API workflow. You can configure anything that is available via the Atlas API like disk size, backup, encryption, cluster region and so on.

Deploying MongoDB cluster in Atlas

NOTE: You need to select the Group ID of the MongoDB Atlas group where you’d like the new cluster to be deployed (you can find it in the Settings->Group Settings screen in your Atlas UI).

After that you’ll only need to select a Slack channel where the notification will be sent after the cluster is created. Click “NEXT” and you’ll get to the final screen with the completed API endpoint information.

Completed API endpoint information

Testing Stamplay workflow

To test the workflow, simply click on the provided link and review the response:

JSON response containing the result of the API requests

If everything went according to plan, you should see the JSON response containing the result of all the API requests made against MongoDB Atlas and be able to observe your cluster being created in the Atlas UI itself:

MongoDB Atlas UI

How MongoDB Atlas integration works in Stamplay

The API endpoint that we’ve just created is powered by a workflow that chains together a series of MongoDB Atlas actions with the Webhook core component.

The workflow is triggered every time the Webhook called autopilot catches something. The workflow expects to receive two parameters on the Webhook endpoint: a clustername and an IP address. These are used in the following steps of the flow to be able to dynamically pass the name of cluster we’re creating and add an IP address to the whitelist.

Webhook workflow

The workflow leverages the Reply with JSON action from the Webhook component and can be used to create microservice workflows that combine or update data across multiple cloud services with a single API.

The sync=true parameter that you can see in the API URL provided at the end of the walkthrough tells the system that the Webhook should wait for execution to complete before returning a response to the client. You can read more about building APIs with Stamplay’s Flows and Webhooks here.

The workflow we created above also uses Stamplay’s error handling capabilities to manage potential failures in Atlas API calls to Atlas — such as trying to create a cluster with a duplicate name — to further improve the developer productivity with the Atlas API.

Built.io integration with MongoDB Atlas

MongoDB has also partnered with Built.io, which provides its own API-first platform to developers. Its main product, Built.io Flow, is an integration Platform-as-a-Service that helps IT professionals and developers unify disparate IT systems.

The following is a quick guide on how to spin up a new cluster in MongoDB Atlas and email its status with Built.io Flow. This same workflow can be used as the foundation for many other integrations, including Cisco Spark, PagerDuty, Slack, and others.

Getting started with Built.io Flow

To get started with Built.io, you will need a Built.io Flow Enterprise account. If you don’t have an existing account, sign up for a free trial account here.

At the end of this process, you should have constructed a flow that looks like this:

Develop a MongoDB-based application with Built.io

Starting from scratch, drag the following actions on to your blank canvas organized in a similar layout as shown above:

  1. Create Cluster
  2. Add Group Whitelist Entry
  3. Create Database User
  4. Send an Email

Connect the actions as displayed in the image above.

MongoDB cluster configuration in Built.io

After connecting everything, edit the Create Cluster action. The following screen is an example of the information you’ll need to input in order to set up the Create Cluster action:

Create MongoDB Cluster

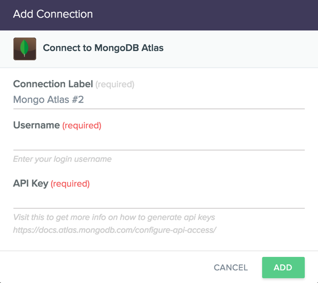
The first thing in the edit window is the Connect to MongoDB Atlas section. Choose Add New and the following screen should pop up. Input your MongoDB Atlas username and then input your API key:

Connecting to MongoDB Atlas

Once you’ve completed adding the connection, get the Group ID from your MongoDB Atlas installation and input it in the Group ID field. Input the Instance Size, the Provider Name, and the Region Name you’d prefer for your new cluster. Be sure to examine all of the fields and their descriptions to customize your new cluster appropriately.

The second step is to enter in the appropriate information for whitelisting an IP Address (or CIDR block) to enable access to your MongoDB cluster. In this case, you’ll need to do a few things:

  1. First, you’ll need to click on Show optional fields to display all of the options.
  2. Second, click inside the Group ID box to grab the mouse focus.
  3. Third, notice the Input section on the right-hand side of the edit window. Click on groupId to place the groupId from the newly formed cluster into the Group ID field here.
  4. Last, go ahead and enter the IP Address or CIDR Block you’d like to whitelist for access to your cluster.

Add group whitelist entry

The third step is to create a new user for your MongoDB database:

  1. As before, pull the Group ID information directly from the newly created cluster.
  2. Then go through and enter all the required information.
  3. Be careful: If you end up changing "Is Editable" to false then you will be unable to edit or delete the created user.
  4. Be sure to record the password as you will never be able to retrieve it from the MongoDB Atlas API.

Create a new user for your MongoDB database

The final step is to send out a confirmation email that everything has been done. This particular action is sent from Built.io’s servers, so it does not require any authentication on your part:

  1. Make sure to show the optional fields if you want to specify whether to send the email via HTML or plain text.
  2. Choose the email address and subject you’d like.
  3. In the Body section, you can click on username from the Create Database User response and name from the Create Cluster response to place both of those in the email.
  4. Press Done.

Send a confirmation email

If you have followed the steps correctly, your MongoDB Atlas workflow is now fully configured.

Testing Built.io workflow

Now that you’re done with your MongoDB Atlas workflow, you can execute it any time you want to by pressing the Play button in the top right corner of the window.

Testing Built.io workflow

There are some other interesting things you can do with Built.io Flow Enterprise. In this particular workflow, you may want to consider looking at the triggers by pressing the Settings icon over the Play action on the canvas. The very first trigger you’ll see available is the Webhook trigger. If you select it and press Save, you’ll set your workflow up to be triggered via a URL. You can use this URL in your scripts or anywhere else that accepts a URL for a web hook.

Another interesting trigger to explore is the PagerDuty trigger. Using a MongoDB Atlas integration with PagerDuty, you can have your Flow execute automatically every time a PagerDuty alert goes out. This can allow you to automate updating a cluster every time you get a low disk space alert from PagerDuty, for example.

Conclusion

Using the MongoDB Atlas API is simple. You can code against it in the programming language of your choice or you can take advantage of one of the modern API integration frameworks available today, such as Built.io or Stamplay, to increase your productivity without sacrificing any of the benefits of MongoDB Atlas.

What was demonstrated here uses only a small portion of the Atlas API. The majority of Atlas API functions, such as working with clusters, users, alerts, and whitelists, are supported both in Built.io Flow and Stamplay and can be leveraged to rapidly create even more comprehensive and sophisticated applications.

Want to know more about MongoDB Atlas? Check out MongoDB Atlas API Documentation and M034 course at MongoDB University!


About the Author – Aleksey Savateyev

Aleksey Savateyev is a Senior Solutions Architect at MongoDB, based in Silicon Valley and focusing on maximizing the value customers get from their investments in MongoDB and MongoDB Atlas.

Introducing the MongoDB Connector for BI 2.0

$
0
0

Earlier this week, we had the pleasure of co-presenting a webinar with our partner, Tableau. Buzz Moschetti (Enterprise Architect at MongoDB) and Vaidy Krishnan (Product Marketing at Tableau) rolled out the updated MongoDB Connector for BI. In addition to explaining how the connector works, Buzz created on-the-fly visualizations of a sample data set in Tableau.

When you pair Tableau’s ease of use, MongoDB’s flexibility, and the connector’s agility, your “time to analytics” gets a whole lot shorter.

Here are the highlights from the session.

What is the Connector for BI?

To answer that question, let's look at the ways MongoDB natively manipulates data.

Our highly expressive MongoDB Query Language (MQL) and the many operators in our Aggregation Framework are powerful tools to process and transform data within MongoDB. We have made many improvements to MQL over the years and with each release, we introduce new operators and different ways to manipulate the contents of your collections. While MQL has slowly incorporated much of the functionality of SQL, the Aggregation Framework will always use the pipeline/stage approach rather than the more grammatical style of SQL.

> db.foo.insert({_id:1, "poly": [ [0,0], [2,12], [4,0], [2,5], [0,0] ] });
> db.foo.insert({_id:2, "poly": [ [2,2], [5,8],  [6,0], [3,1], [2,2] ] });

> db.foo.aggregate([
 {$project: {"conv": {$map: { input: "$poly", as: "z", in: {
                    x: {$arrayElemAt: ["$$z”,0]},  y: {$arrayElemAt: ["$$z”,1]}
                    ,len: {$literal: 0}  }}}}}
,{$addFields: {first: {$arrayElemAt: [ "$conv", 0 ]} }}
,{$project: {"qqq":
    {$reduce: { input: "$conv",  initialValue: "$first",  in: {
                x: "$$this.x”, y: "$$this.y"
                ,len: {$add: ["$$value.len",  // len = oldlen + newLen
  {$sqrt: {$add: [
                          {$pow:[ {$subtract:["$$value.x","$$this.x"]}, 2]}
                          ,{$pow:[ {$subtract:["$$value.y","$$this.y"]}, 2]}
                         ] }} ] } }}
,{$project: {"len": "$qqq.len"}}

{ "_id" : 1, “len" : 35.10137973546188 }
{ "_id" : 2, "len" : 19.346952903339393 }

An example of an MQL aggregation pipeline to calculate the perimeter of simple polygons. Note that the polygons themselves are well-modeled as an array of points – each point itself being a two item array.

The native functions of MongoDB are an excellent match for the document data model and processing nested arrays within documents is uniquely suited for the pipeline methodology.

However, the fact remains that MongoDB does not speak SQL.

We were motivated to create the Connector for BI because of the robust ecosystem of SQL-based tools that empower everyone within an organization to get to data-driven insights faster.

Enter the Connector for BI 2.0.

The connector is a separate process that takes a MongoDB database and maps the document schema into a relational structure that is then held in MySQL.

One of the most powerful characteristics of the connector is that it is not bulk ETL processing. The Connector for BI provides a read-on-demand bridge between your MongoDB collections and your SQL-based tools.

How does the Connector for BI work?

As the Connector for BI is a tool built for the enterprise, we designed it with security and access control in mind. The Connector for BI accesses data stored in your MongoDB database using the same authentication and entitlements you created to secure your data. Fundamentally, that means you cannot process data through the connector that would be otherwise inaccessible from MongoDB directly.

Not only does this keep your data secure, it reduces the need for a separate set of credentials for your InfoSec team to manage.

Along with the connector, MongoDB provides a utility called 'mongodrdl' which examines a source MongoDB database and quickly constructs a default set of mappings between the structures it finds in MongoDB and the tables and columns appropriate to project in a relational schema. This utility is governed by the same security and access protocols as the connector itself.

The MongoDB Connector: A "SQL Bridge"

Using Tableau with MongoDB

At MongoDB, we’re committed to helping developers focus on building next-generation apps and not on database operations. Likewise, Tableau's mission is to help people understand the insights behind their data regardless of skill set or functional role.

Part of this mission encompasses the notion that data will be coming from a wide variety of sources. This requires Tableau to work seamlessly with a broad range of data platforms. To accomplish this ever-growing task, the team at Tableau has engineered a range of data connectors in order to expose information to Tableau’s end user, regardless of where the source data sits. This is essential for Tableau to deliver on their promise of “code-free analytics.”

Tableau is also heavily invested in ensuring that queries run in their platform are returned at optimal speeds, regardless of platform.

As Vaidy put it, “Speed to insight is a function not only of query performance but of the entire process of analytics being more agile.”

That’s why MongoDB and Tableau are excited not only to optimize the speed at which data stored in MongoDB can be processed, but also to make the entire user experience more intuitive and seamless. The ability to capture data without ETL or to painstakingly reformat documents into a relational schema results in a significant reduction of cost and complexity.

How are teams using MongoDB and Tableau today?

Big Data today is not just limited to exploratory data science use cases. It's even being used for operational reporting on day-to-day workloads – the kind traditionally handled by data warehouses. Modern organizations are responding to these hybrid needs by pursuing use case-specific architecture design. This design strategy involves tiering data based on a host of factors including volume, frequency of access, speed of data, and level of aggregation. Broadly, these tiers are:

  • “Cold” - Data in its rawest form, useful for exploration on large volumes
  • “Warm” - Aggregated data for ad hoc diagnostic analyses
  • “Hot” - Fast data for repeatable use cases (KPI dashboards etc.)

In most cases, organizations will use different stores for each tier. With that said,If a deployment is well-tuned and well-indexed, MongoDB can serve as a datastore for “cold” data (ex: data late), “warm” data (ex: a semi-structured data warehouse), or “hot” data (ex: computational data stored in-memory).

MongoDB serves as a datastore

This means that there is a large spectrum of use cases for how MongoDB and Tableau can be deployed in parallel.

See the connector in action

To demonstrate how the connector works, we will be using a MongoDB dataset with information about 25,000 different New York City restaurants. Here’s what the documents look like:

> db.restaurants.findOne();
{
"_id" : ObjectId("5877d52bbf3a4cfc41ef8a03"),
"address" : {
"building" : "1007",
"coord" : [-73.856077, 40.848447],
"street" : "Morris Park Ave",
"zipcode" : "10462"},
"borough" : "Bronx",
"cuisine" : "Bakery",
"grades" : [
{"date" : ISODate("2014-03-03T00:00:00Z"),
"grade" : "A",
"score" : 2,
"inspectorID" : "Z149"},

{"date" : ISODate("2013-09-11T00:00:00Z"),
"grade" : "A",
"score" : 6,
"inspectorID" : "Z126"},

{"date" : ISODate("2013-01-24T00:00:00Z"),
"grade" : "A",
"score" : 10,
"inspectorID" : "Z39"},

{"date" : ISODate("2011-11-23T00:00:00Z"),
"grade" : "A",
"score" : 9,
"inspectorID" : "Z204"},

{"date" : ISODate("2011-03-10T00:00:00Z"),
"grade" : "B",
"score" : 14,
"inspectorID" : "Z189"}],
"name" : "Morris Park Bake Shop",
"restaurant_id" : "30075445",
"avgprc" : NumberDecimal("12.2500000000000")
}

As you can see, this collection contains data points you’d expect (address, cuisine, etc.), but it also contains time-based sanitation grade ratings as a nested array. In a relational schema, you might expect to see this data stored in a different table whereas in MongoDB, it can be retained within the restaurant object.

To transform this database into a form that a SQL-based tool can parse, we use the mongodrdl utility to create the mapping file.

Inspecting the output file will reveal that the nested arrays have been transformed into relational tables. Indeed, connecting to the file from the MySQL shell reveals the new schema:

New schema

Notice how the geospatial data in the source document ("address.coord") was transformed from an array to 2 doubles corresponding to longitude and latitude.

In MongoDB:

"coord" : [-73.856077,40.848447],

Output from the connector:

_id address.coord_longitude address.coord_latitude
5877d52bbf3a4cfc41ef8a03 -73.856077 40.848447

What’s more, if you manipulate data in your original MongoDB collection, the changes will map in real time to the output file.

Now that our data is in a form that a SQL-based tool can understand, let’s move into Tableau.

When connecting to the server through Tableau, we select “MySQL” as that is how Tableau is reading our mapped data set.

Connecting to the server through Tableau

You will then see that all the data has been pulled into Tableau with their correct types. For example, if we drill down on our longitude and latitude columns, Tableau knows to toggle into geo mode:

Tableau geo mode

This allows us to create interesting visualizations with our MongoDB data. Say we want to zoom into New York City and filter by Asian and Chinese cuisine...

Create visualizations with MongoDB data

...you’ll notice a big cluster on the southeast side of Manhattan. We've found Chinatown!

Be sure to watch the full demo to see Buzz explore all of the various ways the connector can be used to pre-aggregate data, hide particular fields, and even do field-level dynamic redaction of data.

Best practices for using MongoDB with Tableau

When preparing a dataset stored in MongoDB for analysis in Tableau, be sure you are following MongoDB best practices. Do you have indexes on frequently-queried fields? Have you pre-joined tables as nested arrays (like the sanitation grades example above)?

As we saw with the translation of geospatial arrays into longitude and latitude doubles, there is great value in letting your data types flow into Tableau. Avoid blurring rich types like datetimes and decimal by down-converting them to strings.

Avoid casting. Some of these operations will be processed in the connector itself, not in MongoDB. For example, complex date arithmetic is not yet pushed down into MongoDB and can greatly impact latency.

Frequently Asked Questions

Should I use the Connector for BI or Tableau Data Extract?
Remember that Tableau will not be able to run queries faster than MongoDB allows. If your data is under-optimized, you may want to consider using Tableau Data Extract instead. Extracts can also be a helpful tool to augment query speed, however they work better for smaller datasets (fewer than 100,000,000 records, 100 columns, etc.). Extracts can reduce load on MongoDB cluster if your cluster is being accessed by many users

Is the Connector for BI available for MongoDB Community?
At this time, the Connector for BI is available as part of MongoDB Enterprise Advanced.

What kind of overhead do the connector and Tableau add to MongoDB response times?
Unless you're running into edge cases where processing is happening in the connector rather than in the database, you will not notice additional latency.

With the previous version of the BI Connector we ran into issues with joins between collections.
The recent release of the Connector for BI (v2.0) introduces significant performance enhancements for these use cases over v1.0.


Be sure to watch the full demo here, and download an evaluation version of the Connector for BI 2.0 for yourself!

Try the MongoDB Connector for BI


How a 520% Increase in Players Sparked Online Gaming Platform Pirate Kings Migration to MongoDB Professional and Cloud Manager

$
0
0

70 million pirates battle it out on MongoDB

Jelly Button Games is a free-to-play mobile gaming company based in Tel Aviv, Israel that focuses on building original games that are mobile-friendly, multi-platform, and allow people to play together no matter where in the world they are located. Founded in 2011, Jelly Button has grown from the five original founders to more than 85 employees.

I’m Shai Zonis, a senior server developer at Jelly Button for the game Pirate Kings. Pirate Kings is a fully realized world where over 70 million pirates battle it out to conquer exotic islands in a quest of gold, artifacts and revenge. Most users notice the palm trees, glimmers of gold, and the quality of the animation, but few think about the tools working behind the scenes to make the game operate seamlessly.

Pirate Kings

After upgrading to MongoDB Professional and Cloud Manager, we have scaled to easily manage 70 million users with 60% cost savings compared to our previous MongoDB hosting provider. While today everything is running smoothly, the path to success wasn’t always nicely paved - we had to fight our own battles to win the day.

Challenges of a third party database hosting service

Our team originally had experience with relational database technologies. However, we knew that a relational database would not provide the scale, agility and performance needed to make a game like Pirate Kings successful. MongoDB was the clear choice, though at the time, we didn’t know much about the operational aspects of running it. In the end we decide to work with a third party MongoDB hosting service to manage our database.

In the early days Jelly Button had a million daily unique users and, for a while, all was going well.

Suddenly, the game went viral and there was a 520% increase in users in just two weeks. The business was excited by this increase in popularity, though the engineering team got a little nervous about the latency spikes impacting the user experience.

Despite the challenges we faced, we initially did not want to migrate from our existing hosting service because of the amount of time and money we had already invested in the platform.

Pirate Kings

The final straw

Fast forward to February of 2016 when our existing third party MongoDB hosting service began to strangle our ability to scale and expand the game. We were constantly facing issues with performance, and the third party service was not able to help us address the problem.

At that point, it was necessary to move beyond a third party and instead work directly with the team that develops the database. We needed to find ways to better manage our data and scale to meet our growing number of users. We tried to make the transition on our own, but quickly realized we could accelerate the upgrade and transition by working directly with MongoDB Professional Services.

Working with Masters - how MongoDB helped replatform our database and grow the business

Before the migration, we were facing exorbitant costs and had very little insight into how the database was performing.

MongoDB Professional Services worked alongside our team to successfully migrate Pirate Kings from the third party hosting service to MongoDB 3.2 configured with the WiredTiger storage engine in under two months. Together we were able to migrate, fix and optimize our database with little downtime. Our consultant was focused on teaching and mentoring the team, and the amount of know-how and technical discussions we had during this time were truly empowering. Working with professional services felt like working with true MongoDB masters.

Once upgraded, we saw a 60% cost savings and we were able to compress 18 shards down to one single replica set. With the transition to WiredTiger, the data size on disk dropped by 60% due to its native compression libraries.

MongoDB Cloud Manager, a platform for managing MongoDB, was also instrumental in giving us full insight into the database for the first time. With Cloud Manager we had much higher levels of data protection and lower operational complexity with managed backups. We were finally able to dig deep into database telemetry to understand the pitfalls that were inherent in our previous service. With MongoDB Professional, we were able to get direct access to 24x7 support.

Overall, the complexity of our database significantly decreased and our database administrators are able to sleep much better.

What’s Next

While the main motivation for migrating away from a third party hosted service was to better manage Pirate Kings data, MongoDB provided us the promise of a better life for our developers and a better future for our company. Today Pirate Kings easily manages 10 million unique players per month. Better yet, our team now feels very comfortable and confident with the technology.

Moving forward, you can expect to see Jelly Button develop two new games per year, all of which - we are excited to say - are being built on MongoDB. They are the pirate kings!


Try MongoDB Cloud Manager


Change the Ratio: Nominate a Female Innovator to Attend MongoDB World

$
0
0

Women have traditionally been significantly underrepresented in technology. At MongoDB, we’re committed to changing the ratio in our industry. MongoDB World, our annual educational conference, is coming up June 20-21 in Chicago, and we’re excited to kickstart another round of the Female Innovators initiative.

The program, now in its second year, aims to make MongoDB World more accessible to women in technology by issuing complimentary tickets to eligible candidates.

At the event, Female Innovators will be able to get insight into building and maintaining applications with MongoDB in technical sessions, have fun at our famous after party, connect with other women in tech at the Women and Trans Coders Lounge, and more.

How it works:

  1. Nominate a woman who works or aspires to work in tech. (You can also nominate yourself. We love self nominations!)
  2. Eligible nominees will be notified of their acceptance status by February 17.
Submit a Nomination

Make sure to act fast; only a limited number of tickets are available.

Award

Eligible nominees will receive complimentary admission to MongoDB World, June 20-21 in Chicago. Please note that travel and lodging is not included in this award.

Eligibility

Nominees must be 18 years old or older, and must identify as women. This includes cis, trans, genderqueer, and nonbinary people who identify as women.


The Modern Application Stack – Part 1: Introducing The MEAN Stack

$
0
0

Introducing the MEAN and MERN stacks

This is the first in a series of blog posts examining the technologies that are driving the development of modern web and mobile applications, notably the MERN and MEAN stacks. The series will go on to step through tutorials to build all layers of an application.

Users increasingly demand a far richer experience from web sites – expecting the same level of performance and interactivity they get with native desktop and mobile apps. At the same time, there's pressure on developers to deliver new applications faster and continually roll-out enhancements, while ensuring that the application is highly available and can be scaled appropriately when needed. Fortunately, there's a (sometimes bewildering) set of enabling technologies that make all of this possible.

If there's one thing that ties these technologies together, it's JavaScript and its successors (ES6, TypeScript, JSX, etc.) together with the JSON data format. The days when the role of JavaScript was limited to adding visual effects like flashing headers or pop-up windows are past. Developers now use JavaScript to implement the front-end experience as well as the application logic and even to access the database. There are two dominant JavaScript web app stacks – MEAN (MongoDB, Express, Angular, Node.js) and MERN (MongoDB, Express, React, Node.js) and so we'll use those as paths to guide us through the ever expanding array of tools and frameworks.

This first post serves as a primer for many of these technologies. Subsequent posts in the series take a deep dive into specific topics – working through the end-to-end development of Mongopop - an application to populate a MongoDB database with realistic data and then perform other operations on that data.

The MEAN Stack

We'll start with MEAN as it's the more established stack but most of what's covered here is applicable to MERN (swap Angular with React).

MEAN is a set of Open Source components that together, provide an end-to-end framework for building dynamic web applications; starting from the top (code running in the browser) to the bottom (database). The stack is made up of:

  • Angular (formerly Angular.js, now also known as Angular 2): Front-end web app framework; runs your JavaScript code in the user's browser, allowing your application UI to be dynamic
  • Express (sometimes referred to as Express.js): Back-end web application framework running on top of Node.js
  • Node.js : JavaScript runtime environment – lets you implement your application back-end in JavaScript
  • MongoDB : Document database – used by your back-end application to store its data as JSON (JavaScript Object Notation) documents

A common theme in the MEAN stack is JavaScript – every line of code you write can be in the same language. You even access the database using MongoDB's native, Idiomatic JavaScript/Node.js driver. What do we mean by idiomatic? Using the driver feels natural to a JavaScript developer as all interaction is performed using familiar concepts such as JavaScript objects and asynchronous execution using either callback functions or promises (explained later). Here's an example of inserting an array of 3 JavaScript objects:

myCollection.insertMany([
    {name: {first: "Andrew", last: "Morgan"},
    {name: {first: "Elvis"}, died: 1977},
    {name: {last: "Mainwaring", title: "Captain"}, born: 1885}
])
.then(
    function(results) {
        resolve(results.insertedCount);
    },
    function(err) {
        console.log("Failed to insert Docs: " + err.message);
        reject(err);
    }
)

Angular 2

Angular, originally created and maintained by Google, runs your JavaScript code within the user's web browsers to implement a reactive user interface (UI). A reactive UI gives the user immediate feedback as they give their input (in contrast to static web forms where you enter all of your data, hit "Submit" and wait).

Reactive web application

Version 1 of Angular was called AngularJS but it was shortened to Angular in Angular 2 after it was completely rewritten in Typescript (a superset of JavaScript) – Typescript is now also the recommended language for Angular apps to use.

You implement your application front-end as a set of components – each of which consists of your JavaScript (TypeScript) code and an HTML template that includes hooks to execute and use the results from your TypeScript functions. Complex application front-ends can be crafted from many simple (optionally nested) components.

Angular application code can also be executed on the back-end server rather than in a browser, or as a native desktop or mobile application.

MEAN Stack architecture

Express

Express is the web application framework that runs your back-end application (JavaScript) code. Express runs as a module within the Node.js environment.

Express can handle the routing of requests to the right parts of your application (or to different apps running in the same environment).

You can run the app's full business logic within Express and even generate the final HTML to be rendered by the user's browser. At the other extreme, Express can be used to simply provide a REST API – giving the front-end app access to the resources it needs e.g., the database.

In this blog series, we will use Express to perform two functions:

  • Send the front-end application code to the remote browser when the user browses to our app
  • Provide a REST API that the front-end can access using HTTP network calls, in order to access the database

Node.js

Node.js is a JavaScript runtime environment that runs your back-end application (via Express).

Node.js is based on Google's V8 JavaScript engine which is used in the Chrome browsers. It also includes a number of modules that provides features essential for implementing web applications – including networking protocols such as HTTP. Third party modules, including the MongoDB driver, can be installed, using the npm tool.

Node.js is an asynchronous, event-driven engine where the application makes a request and then continues working on other useful tasks rather than stalling while it waits for a response. On completion of the requested task, the application is informed of the results via a callback. This enables large numbers of operations to be performed in parallel which is essential when scaling applications. MongoDB was also designed to be used asynchronously and so it works well with Node.js applications.

MongoDB

MongoDB is an open-source, document database that provides persistence for your application data and is designed with both scalability and developer agility in mind. MongoDB bridges the gap between key-value stores, which are fast and scalable, and relational databases, which have rich functionality. Instead of storing data in rows and columns as one would with a relational database, MongoDB stores JSON documents in collections with dynamic schemas.

MongoDB's document data model makes it easy for you to store and combine data of any structure, without giving up sophisticated validation rules, flexible data access, and rich indexing functionality. You can dynamically modify the schema without downtime – vital for rapidly evolving applications.

It can be scaled within and across geographically distributed data centers, providing high levels of availability and scalability. As your deployments grow, the database scales easily with no downtime, and without changing your application.

MongoDB Atlas is a database as a service for MongoDB, letting you focus on apps instead of ops. With MongoDB Atlas, you only pay for what you use with a convenient hourly billing model. With the click of a button, you can scale up and down when you need to, with no downtime, full security, and high performance.

Our application will access MongoDB via the JavaScript/Node.js driver which we install as a Node.js module.

What's Done Where?

tl;dr – it's flexible.

There is clear overlap between the features available in the technologies making up the MEAN stack and it's important to decide "who does what".

Perhaps the biggest decision is where the application's "hard work" will be performed. Both Express and Angular include features to route to pages, run application code, etc. and either can be used to implement the business logic for sophisticated applications. The more traditional approach would be to do it in the back-end in Express. This has several advantages:

  • Likely to be closer to the database and other resources and so can minimise latency if lots of database calls are made
  • Sensitive data can be kept within this more secure environment
  • Application code is hidden from the user, protecting your intellectual property
  • Powerful servers can be used – increasing performance

However, there's a growing trend to push more of the functionality to Angular running in the user's browser. Reasons for this can include:

  • Use the processing power of your users' machines; reducing the need for expensive resources to power your back-end. This provides a more scalable architecture, where every new user brings their own computing resources with them.
  • Better response times (assuming that there aren't too many trips to the back-end to access the database or other resources)
  • Progressive Applications. Continue to provide (probably degraded) service when the client application cannot contact the back-end (e.g. when the user has no internet connection). Modern browsers allow the application to store data locally and then sync with the back-end when connectivity is restored.

Perhaps, a more surprising option for running part of the application logic is within the database. MongoDB has a sophisticated aggregation framework which can perform a lot of analytics – often more efficiently than in Express or Angular as all of the required data is local.

Another decision is where to validate any data that the user supplies. Ideally this would be as close to the user as possible – using Angular to check that a provided password meets security rules allows for instantaneous feedback to the user. That doesn't mean that there isn't value in validating data in the back-end as well, and using MongoDB's document validation functionality can guard against buggy software writing erroneous data.

ReactJS – Rise of the MERN Stack

MERN Stack architecture with React

An alternative to Angular is React (sometimes referred to as ReactJS), a JavaScript library developed by Facebook to build interactive/reactive user interfaces. Like Angular, React breaks the front-end application down into components. Each component can hold its own state and a parent can pass its state down to its child components and those components can pass changes back to the parent through the use of callback functions.

React components are typically implemented using JSX – an extension of JavaScript that allows HTML syntax to be embedded within the code:

class HelloMessage extends React.Component {
  render() {
    return <div>Hello {this.props.name}</div>;
  }
}

React is most commonly executed within the browser but it can also be run on the back-end server within Node.js, or as a mobile app using React Native.

So should you use Angular 2 or React for your new web application? A quick Google search will find you some fairly deep comparisons of the two technologies but in summary, Angular 2 is a little more powerful while React is easier for developers to get up to speed with and use. This blog series will build a near-identical web app using first the MEAN and then the MERN stack – hopefully these posts will help you find a favorite.

The following snapshot from Google Trends suggests that Angular has been much more common for a number of years but that React is gaining ground:

Comparing React/ReactJS popularity vs. Angular and Angular 2

Why are these stacks important?

Having a standard application stack makes it much easier and faster to bring in new developers and get them up to speed as there's a good chance that they've used the technology elsewhere. For those new to these technologies, there exist some great resources to get you up and running.

From MongoDB upwards, these technologies share a common aim – look after the critical but repetitive stuff in order to free up developers to work where they can really add value: building your killer app in record time.

These are the technologies that are revolutionising the web, building web-based services that look, feel, and perform just as well as native desktop or mobile applications.

The separation of layers, and especially the REST APIs, has led to the breaking down of application silos. Rather than an application being an isolated entity, it can now interact with multiple services through public APIs:

  1. Register and log into the application using my Twitter account
  2. Identify where I want to have dinner using Google Maps and Foursquare
  3. Order an Uber to get me there
  4. Have Hue turn my lights off and Nest turn my heating down
  5. Check in on Facebook
  6. ...

Variety & Constant Evolution

Even when constraining yourself to the JavaScript ecosystem, the ever-expanding array of frameworks, libraries, tools, and languages is both impressive and intimidating at the same time. The great thing is that if you're looking for some middleware to perform a particular role, then the chances are good that someone has already built it – the hardest part is often figuring out which of the 5 competing technologies is the best fit for you.

To further complicate matters, it's rare for the introduction of one technology not to drag in others for you to get up to speed on: Node.js brings in npm; Angular 2 brings in Typescript, which brings in tsc; React brings in ES6, which brings in Babel; ....

And of course, none of these technologies are standing still and new versions can require a lot of up-skilling to use – Angular 2 even moved to a different programming language!

The Evolution of JavaScript

The JavaScript language itself hasn't been immune to change.

Ecma International was formed to standardise the language specification for JavaScript (and similar language forks) to increase portability – the ideal being that any "JavaScript" code can run in any browser or other JavaScript runtime environment.

The most recent, widely supported version is ECMAScript 6 – normally referred to as ES6. ES6 is supported by recent versions of Chrome, Opera, Safari, and Node.js). Some platforms (e.g. Firefox and Microsoft Edge) do not yet support all features of ES6. These are some of the key features added in ES6:

  • Classes & modules
  • Promises – a more convenient way to handle completion or failure of synchronous function calls (compared to callbacks)
  • Arrow functions – a concise syntax for writing function expressions
  • Generators – functions that can yield to allow others to execute
  • Iterators
  • Typed arrays

Typescript is a superset of ES6 (JavaScript); adding static type checking. Angular 2 is written in Typescript and Typescript is the primary language to be used when writing code to run in Angular 2.

Because ES6 and Typescript are not supported in all environments, it is common to transpile the code into an earlier version of JavaScript to make it more portable. In this series' Angular post, tsc is used to transpile Typescript into JavaScript while the React post uses Babel (via react-script) to transpile our ES6 code.

And of course, JavaScript is augmented by numerous libraries. The Angular 2 post in this series uses Observables from the RxJS reactive libraries which greatly simplify making asynchronous calls to the back-end (a pattern historically referred to as AJAX).

Summary & What's Next in the Series

This post has introduced some of the technologies used to build modern, reactive, web applications – most notably the MEAN and MERN stacks. If you want to learn exactly how to use these then please continue to follow this blog series which steps through building the MongoPop application:

As already covered in this post, the MERN and MEAN stacks are evolving rapidly and new JavaScript frameworks are being added all of the time. Inevitably, some of the details in this series will become dated but the concepts covered will remain relevant.


If you're interested in learning everything you need to know to get started building a MongoDB-based app you can sign up for one of our free online MongoDB University courses.

Sign up for M101JS: MongoDB for
Node.js Developers today!


Leaf in the Wild: How EG Built a Modern, Event-Driven Architecture with MongoDB to Power Digital Transformation

$
0
0

UK’s Leading Commercial Property Data Service Delivers 50x More Releases Per Month, Achieving Always-On Availability

The total value of the UK commercial property is estimated at close to £1.7 trillion1. Investment decisions on big numbers requires big data, especially in handling a big variety of multi-structured data. And that is why EG, the UK’s leading commercial property data service, turned to MongoDB.

I met with Chris Fleetwood, Senior Director of Technology, and Chad Macey, Principal Architect at EG. We discussed how they are using agile methodologies with devops, cloud computing, and MongoDB as the foundation for the company’s digital transformation – moving from a century old magazine, into a data driven technology service.

Can you start by telling us a little bit about your company?

Building on over 150 years of experience, EG (formerly Estates Gazette) delivers market-leading data & analytics, insight, and decision support tools covering the UK commercial property market. Our services are used by real estate agents, lawyers, investors, surveyors, and property developers. We enable them to make faster, better informed decisions, and to win more business in the property market. We offer a comprehensive range of market data products with information on hundreds of thousands of properties across the UK, accessible across multiple channels including print, digital, online, and events. EG is part of Reed Business Information, providing data and analytics to business professionals around the world.

What is driving digital transformation in your business?

Our business was built on print media, with the Estates Gazette journal serving as the authoritative source on commercial property across the UK for well over a century. Back in the 1990s, we were quick to identify the disruptive potential of the Internet, embracing it as a new channel for information distribution. Pairing our rich catalog of property data and market intelligence with new data sources from mobile and location services – and the ability to run sophisticated analytics across all of it in the cloud – we are accelerating our move into enriched market insights, complemented with decision support systems.

IT was once just a supporting function for the traditional print media side of our business, but digital has now become our core engine for growth and revenue.

Can you describe your platform architecture?

Our data products are built on a microservices-inspired architecture that we call “pods”. Each pod serves a specific data product and audience. For example, the agent pod provides market intelligence for each geographic area such as recent sales, estimated values, local amenities, and zone regulations, along with lists of potential buyers and renters. Meanwhile the surveyor pod will maintain data used to generate valuations of true market worth. The pods also implement the business rules that drive the workflow for each of our different user audiences.

The advantage of our pod-based architecture is that it improves on our deployment and operational capabilities, supporting the transition to continuous delivery – giving us faster time to market for new features demanded by our customers. Each pod is owned by a “squad” with up to half a dozen members, comprising devops engineers, architects, and product managers.

EG Pod Architecture

Figure 1: EG Pod Architecture

How are you using MongoDB in this architecture?

Each pod maintains a local instance of the data it needs, pulling from a centralized system of record that stores all property details, transactions, locations, market data, availability, and so on. The system of record – or the “data-core pod” as we call it – in addition to each of the data product pods all run on MongoDB.

MongoDB is at the center of our event driven architecture. All updates are committed to the system of record – for example, when a new property comes onto the market – which then uses the Amazon Web Services (AWS) SNS push notification and SQS message queue services to publish the update to all the other product pods. This approach means all pods are working with the latest copy of the data, while avoiding tight coupling between each pod and the core database.

Why did you select MongoDB?

Agility and time to market are critical. We decided to use a Javascript-based technology stack that allows consistent developer experience from the client, to the server, through to the database, without having to deal with any translations between layers.

We evaluated multiple database options as part of our platform modernization:

  • Having used relational databases extensively in the past, we knew the pain and friction involved with having to define a schema in the database, and then re-implement that same schema again in an ORM at the application layer. And we would need to repeat this process for each pod we developed, and for each change in the data model as we evolved application functionality.
  • We also took a look at an alternative NoSQL document database, but it did not provide the development speed we needed as we found it was far too complex and difficult to use.

As the M in the MEAN stack, we knew MongoDB would work well with Javascript and Node.js. I spun up a local instance on my laptop, and was up and running in less that 5 minutes, and productive within the hour. I judge all technology by my one hour rule. Basically, if within an hour I can start to understand and be productive with the technology, that tells me it's got a really good developer experience, supported by comprehensive documentation. If it's harder than that, I’m not likely to get along with that technology in the longer term. We didn’t look back from that point onwards – we put MongoDB through its paces to ensure it delivered the schema flexibility, query functionality, performance, and scale we needed, and it passed all of our tests.

Can you describe your MongoDB deployment?

We run MongoDB Enterprise Advanced on AWS. We get access to MongoDB support, in addition to advanced tooling. We are in the process of installing Ops Manager to take advantage of fine-grained monitoring telemetry delivered to our devops team. This insight enables them to continue to scale the service as we onboard more data products and customers.

MongoDB Compass is a new tool we’ve started evaluating. The schema visualizations can help our developers to explore and optimize each pod’s data model. The new integrated geospatial querying capability is especially valuable for our research teams. They can use the Compass GUI to construct sophisticated queries with a simple point and click interface, returning results graphically, and as sets of JSON documents. Without this functionality, our valuable developer resource would have been tied up creating the queries for them.

We will also be upgrading to the latest MongoDB release to take advantage of the MongoDB Encrypted storage engine to extend our security profile, and prepare for the new EU General Data Protection Regulation (GDPR) market legislation that is coming into force in 2018.

How is MongoDB performing for you?

MongoDB has been rock solid for us. With very few operational issues our team is able to focus on building new products. The flexible data model, rich query language, and indexing makes development super-fast. Geospatial search is the starting point for the user experience – a map is the first thing a customer sees when they access our data products. MongoDB’s geospatial queries and indexes allow our customers to easily navigate market data by issuing polygon searches that display properties within specific coordinates of interest.

Navigating property market data with geospatial search UI

Figure 2: Navigating property market data with sophisticated geospatial search UI

We also depend on the MongoDB aggregation pipeline to generate the analytics and insights the business, and our customers, rely on. For example, we can quickly generate averages for rents achieved in a specific area, aggregated against the total number of transactions over a given time period. Each MongoDB release enriches the aggregation pipeline, so we always have new classes of analytics we can build on top of the database.

How are you measuring the impact of MongoDB on your business?

It’s been a core part of our team transitioning from being a business support function to being an enabler of new revenue streams. With our pod-based architecture powered by MongoDB, we can get products to market faster, and release more frequently.

With relational databases, we were constrained to one new application deployment per month. With MongoDB, we are deploying 50 to 60 times per month. With MongoDB’s self-healing replica set architecture, we’ve delivered improved uptime to deliver always-on availability to the business.

Chris and Chad, thanks for taking the time to share your experiences with the MongoDB community

To learn more about microservices, download our new whitepaper:

Microservices and the Evolution of Building Modern Apps


1. http://www.bpf.org.uk/about-real-estate

The Modern Application Stack – Part 2: Using MongoDB With Node.js

$
0
0

Introduction

This is the second in a series of blog posts examining the technologies that are driving the development of modern web and mobile applications.

"Modern Application Stack – Part 1: Introducing The MEAN Stack" introduced the technologies making up the MEAN (MongoDB, Express, Angular, Node.js) and MERN (MongoDB, Express, React, Node.js) Stacks, why you might want to use them, and how to combine them to build your web application (or your native mobile or desktop app).

The remainder of the series is focussed on working through the end to end steps of building a real (albeit simple) application – MongoPop.

This post demonstrates how to use MongoDB from Node.js.

MongoDB (recap)

MongoDB provides the persistence for your application data.

MongoDB is an open-source, document database designed with both scalability and developer agility in mind. MongoDB bridges the gap between key-value stores, which are fast and scalable, and relational databases, which have rich functionality. Instead of storing data in rows and columns as one would with a relational database, MongoDB stores JSON documents in collections with dynamic schemas.

MongoDB's document data model makes it easy for you to store and combine data of any structure, without giving up sophisticated validation rules, flexible data access, and rich indexing functionality. You can dynamically modify the schema without downtime – vital for rapidly evolving applications.

It can be scaled within and across geographically distributed data centers, providing high levels of availability and scalability. As your deployments grow, the database scales easily with no downtime, and without changing your application.

MongoDB Atlas is a database as a service for MongoDB, letting you focus on apps instead of ops. With MongoDB Atlas, you only pay for what you use with a convenient hourly billing model. With the click of a button, you can scale up and down when you need to, with no downtime, full security, and high performance.

Our application will access MongoDB via the JavaScript/Node.js driver which we install as a Node.js module.

Node.js (recap)

Node.js is a JavaScript runtime environment that runs your back-end application (via Express).

Node.js is based on Google's V8 JavaScript engine which is used in the Chrome browser. It also includes a number of modules that provides features essential for implementing web applications – including networking protocols such as HTTP. Third party modules, including the MongoDB driver, can be installed, using the npm tool.

Node.js is an asynchronous, event-driven engine where the application makes a request and then continues working on other useful tasks rather than stalling while it waits for a response. On completion of the requested task, the application is informed of the results via a callback (or a promise or Observable. This enables large numbers of operations to be performed in parallel – essential when scaling applications. MongoDB was also designed to be used asynchronously and so it works well with Node.js applications.

The application – Mongopop

MongoPop is a web application that can be used to help you test out and exercise MongoDB. After supplying it with the database connection information (e.g., as displayed in the MongoDB Atlas GUI), MongoPop provides these features:

  • Accept your username and password and create the full MongoDB connect string – using it to connect to your database
  • Populate your chosen MongoDB collection with bulk data (created with the help of the Mockeroo service)
  • Count the number of documents
  • Read sample documents
  • Apply bulk changes to selected documents
Mongopop Demo

Downloading, running, and using the Mongopop application

Rather than installing and running MongoDB ourselves, it's simpler to spin one up in MongoDB Atlas:

Create MongoDB Atlas Cluster

To get the application code, either download and extract the zip file or use git to clone the Mongopop repo:

git clone git@github.com:am-MongoDB/MongoDB-Mongopop.git
cd MongoDB-Mongopop

If you don't have Node.js installed then that needs to be done before building the application; it can be downloaded from nodejs.org .

A file called package.json is used to control npm (the package manager for Node.js); here is the final version for the application:

The scripts section defines a set of shortcuts that can be executed using npm run <script-name>. For example npm run debug runs the Typescript transpiler (tsc) and then the Express framework in debug mode. start is a special case and can be executed with npm start.

Before running any of the software, the Node.js dependencies must be installed (into the node_modules directory):

npm install

Note the list of dependencies in package.json – these are the Node.js packages that will be installed by npm install. After those modules have been installed, npm will invoke the postinstall script (that will be covered in Part 4 of this series). If you later realise that an extra package is needed then you can install it and add it to the dependency list with a single command. For example, if the MongoDB Node.js driver hadn't already been included then it could be added with npm install --save mongodb – this would install the package as well as saving the dependency in package.json.

The application can then be run:

npm start

Once running, browse to http://localhost:3000/ to try out the application. When browsing to that location, you should be rewarded with the IP address of the server where Node.js is running (useful when running the client application remotely) – this IP address must be added to the IP Whitelist in the Security tab of the MongoDB Atlas GUI. Fill in the password for the MongoDB user you created in MongoDB Atlas and you're ready to go. Note that you should get your own URL, for your own data set using the Mockaroo service – allowing you to customise the format and contents of the sample data (and avoid exceeding the Mockaroo quota limit for the example URL).

What are all of these files?

  • package.json: Instructs the Node.js package manager (npm) what it needs to do; including which dependency packages should be installed
  • node_modues: Directory where npm will install packages
  • node_modues/mongodb: The MongoDB driver for Node.js
  • node_modues/mongodb-core: Low-level MongoDB driver library; available for framework developers (application developers should avoid using it directly)
  • javascripts/db.js: A JavaScript module we've created for use by our Node.js apps (in this series, it will be Express) to access MongoDB; this module in turn uses the MongoDB Node.js driver.

The rest of the files and directories can be ignored for now – they will be covered in later posts in this series.

Architecture

Using the JavaScript MongoDB Node.js Driver

The MongoDB Node.js Driver provides a JavaScript API which implements the network protocol required to read and write from a local or remote MongoDB database. If using a replica set (and you should for production) then the driver also decides which MongoDB instance to send each request to. If using a sharded MongoDB cluster then the driver connects to the mongos query router, which in turn picks the correct shard(s) to direct each request to.

We implement a shallow wrapper for the driver (javascripts/db.js) which simplifies the database interface that the application code (coming in the next post) is exposed to.

Code highlights

javascripts/db.js defines an /object prototype/ (think class from other languages) named DB to provide access to MongoDB.

Its only dependency is the MongoDB Node.js driver:

var MongoClient = require('mongodb').MongoClient;

The prototype has a single property – db which stores the database connection; it's initialised to null in the constructor:

function DB() {
    this.db = null;            // The MongoDB database connection
}

The MongoDB driver is asynchronous (the function returns without waiting for the requested operation to complete); there are two different patterns for handling this:

  1. The application passes a callback function as a parameter; the driver will invoke this callback function when the operation has run to completion (either on success or failure)
  2. If the application does not pass a callback function then the driver function will return a promise

This application uses the promise-based approach. This is the general pattern when using promises:

The methods of the DB object prototype we create are also asynchronous and also return promises (rather than accepting callback functions). This is the general pattern for returning and then subsequently satisfying promises:

db.js represents a thin wrapper on top of the MongoDB driver library and so (with the background on promises under our belt) the code should be intuitive. The basic interaction model from the application should be:

  1. Connect to the database
  2. Perform all of the required database actions for the current request
  3. Disconnect from the database

Here is the method from db.js to open the database connection:

One of the simplest methods that can be called to use this new connection is to count the number of documents in a collection:

Note that the collection method on the database connection doesn't support promises and so a callback function is provided instead.

And after counting the documents; the application should close the connection with this method:

Note that then also returns a promise (which is, in turn, resolved or rejected). The returned promise could be created in one of 4 ways:

  1. The function explicitly creates and returns a new promise (which will eventually be resolved or rejected).
  2. The function returns another function call which, in turn, returns a promise (which will eventually be resolved or rejected).
  3. The function returns a value – which is automatically turned into a resolved promise.
  4. The function throws an error – which is automatically turned into a rejected promise.

In this way, promises can be chained to perform a sequence of events (where each step waits on the resolution of the promise from the previous one). Using those 3 methods from db.js, it's now possible to implement a very simple application function:

That function isn't part of the final application – the actual code will be covered in the next post – but jump ahead and look at routes/pop.js if your curious).

It's worth looking at the sampleCollection prototype method as it uses a database /cursor/ . This method fetches a "random" selection of documents – useful when you want to understand the typical format of the collection's documents:

Note that collection.aggregate doesn't actually access the database – that's why it's a synchronous call (no need for a promise or a callback) – instead, it returns a cursor. The cursor is then used to read the data from MongoDB by invoking its toArray method. As toArray reads from the database, it can take some time and so it is an asynchronous call, and a callback function must be provided (toArray doesn't support promises).

The rest of these database methods can be viewed in db.js but they follow a similar pattern. The Node.js MongoDB Driver API documentation explains each of the methods and their parameters.

Summary & what's next in the series

This post built upon the first, introductory, post by stepping through how to install and use Node.js and the MongoDB Node.js driver. This is our first step in building a modern, reactive application using the MEAN and MERN stacks.

The blog went on to describe the implementation of a thin layer that's been created to sit between the application code and the MongoDB driver. The layer is there to provide a simpler, more limited API to make application development easier. In other applications, the layer could add extra value such as making semantic data checks.

The next part of this series adds the Express framework and uses it to implement a REST API to allow clients to send requests of the MongoDB database. That REST API will subsequently be used by the client application (using Angular in Part 4 or React in Part 5).

Continue following this blog series to step through building the remaining stages of the MongoPop application:


If you're interested in learning everything you need to know to get started building a MongoDB-based app you can sign up for one of our free online MongoDB University courses.

Sign up for M101JS: MongoDB for
Node.js Developers today!


MongoDB Ops Manager 3.4 User Interface Changes

$
0
0

Ops Manager 3.4, released at the beginning of December, contains both new features and changes from the previous major release, 2.0. This blog post will focus on the new Ops Manager 3.4 UI. It will cover new features and highlight changes from the previous UI.

Deployment Page

Ops Manager 3.4 has a redesigned deployment page. Items that previously appeared in the inner left-hand navigation bar now appear as tabs. Joining the existing tab for Processes are tabs for Servers and Agents. Security settings also now appear under a separate Security tab. These include USERS, ROLES and AUTHORIZATION & TSL/SSL SETTINGS. The TOPOLOGY and LIST views are now accessed via buttons. Additional functions are accessible under More: Host Mappings, Version Manager, and Logs.

 Ops Manager Deployment Page 3.4
Ops Manager Deployment Page 3.4

Alerts Tab

Ops Manager 2.0 featured dedicated icons on the top of page showing the health of the agents.

Ops Manager Alerts 2.0

In Ops Manager 3.4, agent health is reported via alerts. These alerts function identically to all other alerts and appear in the Alerts tab. Agent alerts are active by default.

Ops Manager Alerts 3.4

Alert Management

In Ops Manager 2.0, the alert types (OPEN ALERTS, CLOSED ALERTS, ALL ACTIVITY) are selected using buttons. The alert settings page is accessed via the ellipsis button in the upper right-hand corner of the page. The settings page contains the ADD button, via which new alerts are created.

Ops Manager 2.0 Alert Management

In Ops Manager 3.4, the alert types have become tabs. In addition to the 3 alert types, alert settings have been moved to a fourth tab, Alert Settings. The ADD button is now on the main alerts page, right above the tabs.

Ops Manager 3.4 Alert Management

Metrics

In Ops Manager 2.0, metric chart zoom and granularity are set via buttons. "Last Ping" information is accessed via the ellipsis button.

Ops Manager Metrics 2.0

In Ops Manager 3.4, zoom and granularity were changed to drop-down menus, and an additional 10-second granularity setting was added for improved resolution. The granularity drop-down also has a new "auto" setting which chooses the optimum granularity based on the display period. "Last Ping" information is now listed under More. For HW metrics, use of munin-node is no longer required. HW metrics are automatically gathered for automated deployments.

Ops Manager Metrics 3.4

Documentation and Support

For Ops Manager 2.0, documentation and support were accessed via icons in the top-right corner of the page.

Ops Manager 2.0 Docs and Support

In Ops Manager 3.4, those are accessed via buttons at the bottom of the left-hand navigation bar.

Ops Manager 3.4 Docs and Supoort

Admin Page

For Ops Manager 3.4, existing functionality on the Admin page remains identical to version 2.0. This page is also the location for accessing two new features: S3 blockstore configuration for backups (under the existing Backup button) and server pool administration (under the new Server Pool button). For more details on these features, see the Ops Manager documentation.

Ops Manager 3.4 Admin Page


Learn more about MongoDB Ops Manager 3.4.

MongoDB Ops Manager 3.4


About the Authors

Pavel Duchovny and Eric Sommer are Technical Services Engineers in MongoDB's Tel Aviv office. You can learn more about MongoDB Technical Support at https://docs.mongodb.com/manual/support.

The Modern Application Stack – Part 3: Building a REST API Using Express.js

$
0
0

Introduction

This is the third in a series of blog posts examining the technologies that are driving the development of modern web and mobile applications.

Part 1: Introducing The MEAN Stack (and the young MERN upstart) introduced the technologies making up the MEAN (MongoDB, Express, Angular, Node.js) and MERN (MongoDB, Express, React, Node.js) Stacks, why you might want to use them, and how to combine them to build your web application (or your native mobile or desktop app).

The remainder of the series is focused on working through the end to end steps of building a real (albeit simple) application. – MongoPop. Part 2: Using MongoDB With Node.js created an environment where we could work with a MongoDB database from Node.js; it also created a simplified interface to the MongoDB Node.js Driver.

This post builds on from those first posts by using Express to build a REST API so that a remote client can work with MongoDB. You will be missing a lot of context if you have skipped those posts – it's recommended to follow through those first.

The REST API

A Representational State Transfer (REST) interface provides a set of operations that can be invoked by a remote client (which could be another service) over a network, using the HTTP protocol. The client will typically provide parameters such as a string to search for or the name of a resource to be deleted.

Many services provide a REST API so that clients (their own and those of 3rd parties) and other services can use the service in a well defined, loosely coupled manner. As an example, the Google Places API can be used to search for information about a specific location:

Breaking down the URI used in that curl request:

  • No method is specified and so the curl command defaults to a HTTP GET.
  • maps.googleapis.com is the address of the Google APIs service.
  • /maps/api/place/details/json is the route path to the specific operation that's being requested.
  • placeid=ChIJKxSwWSZgAUgR0tWM0zAkZBc is a parameter (passed to the function bound to this route path), identifying which place we want to read the data for.
  • key=AIzaSyC53qhhXAmPOsxc34WManoorp7SVN_Qezo is a parameter indicating the Google API key, verifying that it's a registered application making the request (Google will also cap, or bill for, the number of requests made using this key).

There's a convention as to which HTTP method should be used for which types of operation:

  • GET: Fetches data
  • POST: Adds new data
  • PUT: Updates data
  • DELETE: Removes data

Mongopop's REST API breaks this convention and uses POST for some read requests (as it's simpler passing arguments than with GET).

These are the REST operations that will be implemented in Express for Mongopop:

Express routes implemented for the Mongopop REST API
Route Path HTTP Method Parameters Response Purpose
                      
/pop/
GET
{
"AppName": "MongoPop",
"Version": 1.0
}
        
Returns the version of the API.
/pop/ip
GET
{"ip": string}
Fetches the IP Address of the server running the Mongopop backend.
/pop/config
GET
{
mongodb: {
    defaultDatabase: string,
    defaultCollection: string,
    defaultUri: string
},
mockarooUrl: string
}
        
Fetches client-side defaults from the back-end config file.
/pop/addDocs
POST
{
MongoDBURI: string,
collectionName: string,
dataSource: string,
numberDocs: number,
unique: boolean
}
        
{
success: boolean,
count: number,
error: string
}
        
Add numberDocs batches of documents, using documents fetched from dataSource
/pop/sampleDocs
POST
{
MongoDBURI: string,
collectionName: string,
numberDocs: number
}
        
{
success: boolean,
documents: string, error: string }
Read a sample of the documents from a collection.
/pop/countDocs
POST
{
MongoDBURI: string,
collectionName: string
}
        
{
success: boolean,
count: number, error: string }
Counts the number of documents in the collection.
/pop/updateDocs
POST
{
MongoDBURI: string,
collectionName: string,
matchPattern: Object,
dataChange: Object,
threads: number
}
        
{
success: boolean,
count: number,
error: string
}
        
Apply an update to all documents in a collection which match a given pattern

Express

Express is the web application framework that runs your back-end application (JavaScript) code. Express runs as a module within the Node.js environment.

Express can handle the routing of requests to the right functions within your application (or to different apps running in the same environment).

You can run the app's full business logic within Express and even use an optional view engine to generate the final HTML to be rendered by the user's browser. At the other extreme, Express can be used to simply provide a REST API – giving the front-end app access to the resources it needs e.g., the database.

The Mongopop application uses Express to perform two functions:

  • Send the front-end application code to the remote client when the user browses to our app
  • Provide a REST API that the front-end can access using HTTP network calls, in order to access the database

Downloading, running, and using the application

The application's Express code is included as part of the Mongopop package installed in Part 2: Using MongoDB With Node.js.

What are all of these files?

A reminder of the files described in Part 2:

  • package.json: Instructs the Node.js package manager (npm) on what it needs to do; including which dependency packages should be installed
  • node_modues: Directory where npm will install packages
  • node_modues/mongodb: The MongoDB driver for Node.js
  • node_modues/mongodb-core: Low-level MongoDB driver library; available for framework developers (application developers should avoid using it directly)
  • javascripts/db.js: A JavaScript module we've created for use by our Node.js apps (in this series, it will be Express) to access MongoDB; this module in turn uses the MongoDB Node.js driver.

Other files and directories that are relevant to our Express application:

  • config.js: Contains the application–specific configuration options
  • bin/www: The script that starts an Express application; this is invoked by the npm start script within the package.json file. Starts the HTTP server, pointing it to the app module in app.js
  • app.js: Defines the main application module (app). Configures:
    • That the application will be run by Express
    • Which routes there will be & where they are located in the file system (routes directory)
    • What view engine to use (Jade in this case)
    • Where to find the /views/ to be used by the view engine (views directory)
    • What middleware to use (e.g. to parse the JSON received in requests)
    • Where the static files (which can be read by the remote client) are located (public directory)
    • Error handler for queries sent to an undefined route
  • views: Directory containing the templates that will be used by the Jade view engine to create the HTML for any pages generated by the Express application (for this application, this is just the error page that's used in cases such as mistyped routes ("404 Page not found"))
  • routes: Directory containing one JavaScript file for each Express route
    • routes/pop.js: Contains the Express application for the /pop route; this is the implementation of the Mongopop REST API. This defines methods for all of the supported route paths.
  • public: Contains all of the static files that must be accessible by a remote client (e.g., our Angular to React apps). This is not used for the REST API and so can be ignored until Parts 4 and 5.

The rest of the files and directories can be ignored for now – they will be covered in later posts in this series.

Architecture

REST AIP implemented in Express.js

The new REST API (implemented in routes/pop.js) uses the javascripts/db.js database layer implemented in Part 2 to access the MongoDB database via the MongoDB Node.js Driver. As we don't yet have either the Angular or React clients, we will user the curl command-line tool to manually test the REST API.

Code highlights

config.js

The config module can be imported by other parts of the application so that your preferences can be taken into account.

expressPort is used by bin/www to decide what port the web server should listen on; change this if that port is already in use.

client contains defaults to be used by the client (Angular or React). It's important to create your own schema at Mockaroo.com and replace client.mockarooUrl with your custom URL (the one included here will fail if used too often).

bin/www

This is mostly boiler-plate code to start Express with your application. This code ensures that it is our application, app.js, that is run by the Express server:

This code uses the expressPort from config.js as the port for the server to listen on; it will be overruled if the user sets the PORT environment variable:

app.js

This file defines the app module ; much of the contents are boilerplate (and covered by comments in the code) but we look here at a few of the lines that are particular to this application.

Make this an Express application:

Define where the views (templates used by the Jade view engine to generate the HTML code) and static files (files that must be accessible by a remote client) are located:

Create the /pop route and associate it with the file containing its code (routes/pop.js):

routes/pop.js

This file implements each of the operations provided by the Mongopop REST API. Because of the the /pop route defined in app.js Express will direct any URL of the form http://<mongopop-server>:3000/pop/X here. Within this file a route handler is created in order direct incoming requests to http://<mongopop-server>:3000/pop/X to the appropriate function:

As the /pop route is only intended for the REST API, end users shouldn't be browsing here but we create a top level handler for the GET method in case they do:

Results of browsing to the top-route for the Mongopop MongoDB application

This is the first time that we see how to send a response to a request; res.json(testObject); converts testObject into a JSON document and sends it back to the requesting client as part of the response message.

The simplest useful route path is for the GET method on /pop/ip which sends a response containing the IP address of the back-end server. This is useful to the Mongopop client as it means the user can see it and add it to the MongoDB Atlas whitelist. The code to determine and store publicIP is left out here but can be found in the full source file for pop.js.

Fetching the IP address for the MongoDB Mongopop back-end using REST API

We've seen that it's possible to test GET methods from a browser's address bar; that isn't possible for POST methods and so it's useful to be able to test using the curl command-line command:

The GET method for /pop/config is just as simple – responding with the client-specific configuration data:

The results of the request are still very simple but the output from curl is already starting to get messy; piping it through python -mjson.tool makes it easier to read:

The simplest operation that actually accesses the database is the POST method for the /pop/countDocs route path:

database is an instance of the object prototype defined in javascripts/db (see The Modern Application Stack – Part 2: Using MongoDB With Node.js) and so all this method needs to do is use that object to:

  • Connect to the database (using the address of the MongoDB server provided in the request body). The results from the promise returned by database.connect is passed to the function(s) in the first .then clause. Refer back to Part 2: Using MongoDB With Node.js if you need a recap on using promises.
  • The function in the .then clause handles the case where the database.connect promise is resolved (success). This function requests a count of the documents – the database connection information is now stored within the database object and so only the collection name needs to be passed. The promise returned by database.countDocuments is passed to the next .then clause. Note that there is no second (error) function provided, and so if the promise from database.connect is rejected, then that failure passes through to the next .then clause in the chain.
  • The second .then clause has two functions:
    • The first is invoked if and when the promise is resolved (success) and it returns a success response (which is automatically converted into a resolved promise that it passed to the final .then clause in the chain). count is the value returned when the promise from the call to database.countDocuments was resolved.
    • The second function handles the failure case (could be from either database.connect or database.countDocuments) by returning an error response object (which is converted to a resolved promise).
  • The final .then clause closes the database connection and then sends the HTTP response back to the client; the response is built by converting the resultObject (which could represent success or failure) to a JSON string.

Once more, curl can be used from the command-line to test this operation; as this is a POST request, the --data option is used to pass the JSON document to be included in the request:

curl can also be used to test the error paths. Cause the database connection to fail by using the wrong port number in the MongoDB URI:

Cause the count to fail by using the name of a non-existent collection:

The POST method for the pop/sampleDocs route path works in a very similar way:

Testing this new operation:

The POST method for pop/updateDocs is a little more complex as the caller can request multiple update operations be performed. The simplest way to process multiple asynchronous, promise-returning function calls in parallel is to build an array of the tasks and pass it to the Promise.all method which returns a promise that either resolves after all of the tasks have succeeded or is rejected if any of the tasks fail:

Testing with curl:

The final method uses example data from a service such as Mockaroo to populate a MongoDB collection. A helper function is created that makes the call to that external service:

That function is then used in the POST method for /pop/addDocs:

This method is longer than the previous ones – mostly because there are two paths:

  • In the first path, the client has requested that a fresh set of 1,000 example documents be used for each pass at adding a batch of documents. This path is much slower and will eat through your Mockaroo quota much faster.
  • In the second path, just one batch of 1,000 example documents is fetched from Mockaroo and then those same documents are repeatedly added. This path is faster but it results in duplicate documents (apart from a MongoDB-created _id field). This path cannot be used if the _id is part of the example documents generated by Mockaroo.

So far, we've used the Chrome browser and the curl command-line tool to test the REST API. A third approach is to use the Postman Chrome app:

Testing MongoDB Mongopop REST API with Postman Chrome app

Debugging Tips

One way to debug a Node.js application is to liberally sprinkle console.log messages throughout your code but that takes extra effort and bloats your code base. Every time you want to understand something new, you must add extra logging to your code and then restart your application.

Developers working with browser-side JavaScript benefit from the excellent tools built into modern browsers – for example, Google's Chrome Developer Tools which let you:

  • Browse code (e.g. HTML and JavaScript)
  • Add breakpoints
  • View & alter contents of variables
  • View and modify css styles
  • View network messages
  • Access the console (view output and issue commands)
  • Check security details
  • Audit memory use, CPU, etc.

You open the Chrome DevTools within the Chrome browser using "View/Developer/Developer Tools".

Fortunately, you can use the node-debug command of node-inspector to get a very similar experience for Node.js back-end applications. To install node-inspector:

node-inspector can be used to debug the Mongopop Express application by starting it with node-debug via the express-debug script in package.json:

To run the Mongopop REST API with node-debug, kill the Express app if it's already running and then execute:

Note that this automatically adds a breakpoint at the start of the app and so you will need to skip over that to run the application.

Using Chrome Developer Tools with MongoDB Express Node.js application

Depending on your version of Node.js, you may see this error:

If you do, apply this patch to /usr/local/lib/node_modules/node-inspector/lib/InjectorClient.js.

Summary & what's next in the series

Part 1: Introducing The MEAN Stack provided an overview of the technologies that are used by modern application developers – in particular, the MERN and MEAN stacks. Part 2: Using MongoDB With Node.js set up Node.js and the MongoDB Driver and then used them to build a new Node.js module to provide a simplified interface to the database.

This post built upon the first two of the series by stepping through how to implement a REST API using Express. We also looked at three different ways to test this API and how to debug Node.js applications. This REST API is required by both the Angular (Part 4) and React (Part 5) web app clients, as well as by the alternative UIs explored in Part 6.

The next part of this series implements the Angular client that makes use of the REST API – at the end of that post, you will understand the end-to-end steps required to implement an application using the MEAN stack.

Continue to follow this blog series to step through building the remaining stages of the MongoPop application:


If you're interested in learning everything you need to know to get started building a MongoDB-based app you can sign up for one of our free online MongoDB University courses.

Sign up for M101JS: MongoDB for
Node.js Developers today!


Leaf in the Wild: Powering Smart Factory IoT with MongoDB

$
0
0

BEET Analytics OEMs MongoDB for its Envision manufacturing IOT platform. MongoDB helps Envision deliver 1-2 orders of magnitude better performance than SQL Server, resulting in increased manufacturing throughput and reduced costs

Leaf in the Wild posts highlight real world MongoDB deployments. Read other stories about how companies are using MongoDB for their mission-critical projects.

BEET Analytics Technology creates solutions to help the manufacturing industry transition to smart IOT factories for the next evolution of manufacturing. BEET’s Process Visibility System, Envision, makes the assembly line machine process visible and measurable down to every motion and event. Built on MongoDB, Envision is able to precisely analyze telemetry data streamed from sensors on the production line to help improve the manufacturing process.

At MongoDB World 2016, BEET Analytics was a recipient of a MongoDB Innovation Award, which recognizes organizations and individuals that took a giant idea and made a tangible impact on the world.

I had the opportunity to sit down with Girish Rao, Director of Core Development, to discuss how BEET Analytics harnesses MongoDB to power its Envision platform.

Can you tell us a little bit about BEET Analytics?

Founded in June 2011, BEET Analytics Technology is a smart manufacturing solution provider. We provide a Process Visibility System (PVS) built upon Envision, the software created by BEET. Envision monitors the automated assembly line for any potential issues in throughput, performance, and availability –- and alerts users about possible breakdowns before they occur. For our customers, one minute of lost production time can result in a significant loss of revenue, sothus we collect and monitor the vital details of an automated assembly line. This provides predictive analytics and insights that avoid unplanned downtime and help sustain higher manufacturing throughput.

Why did you decide to OEM MongoDB?

When we started using MongoDB about 4 years ago, it was not as well known as it is now – at least not in the manufacturing industry. Our strategy was to build a complete product with MongoDB embedded within our system. We could then bring our complete system, deploy it in the plant, and have it run out of the box. This helped minimize the burden on our customer plant’s IT department to manage multiple software and hardware products. This model has worked well for us to introduce our product into several customer plants. Not only have we been able to provide a seamless customer experience, but MongoDB’s expertise both in development and production has helped us to accelerate our own product development. Additionally, co-marketing activities that promote our joint solution have been extremely beneficial to us.

How does BEET Analytics Use MongoDB today?

The Envision platform consists of multiple data collectors, which are PC based devices that are deployed close to the assembly line and stream data from the Programmable Logic Controllers (PLC). The PLCs (0.05 - 0.08 second scan cycle) continuously monitor the “motion” of hundreds of moving parts in the manufacturing facility. Each “motion” is captured by data collectors and stored in MongoDB. The daily transactional data for an assembly line creates about 1-3 million MongoDB documents per day, and we typically keep between 3-6 months worth of data, which comes out to be about 500 million documents.

Can you describe your MongoDB deployment and how it’s configured?

Each data collector on the assembly line runs its own standalone MongoDB instance. For a medium sized assembly line, we will typically have 1-2 data collectors, while a larger assembly line can have 4-6 data collectors. The data collectors transfer the data through a web service up to a central repository that is backed by a MongoDB replica set and where the Envision application server runs. The central MongoDB replica set consists of a primary node, running Linux, and two secondaries that run Windows. We use Windows as a secondary because we also run Internet Information Services (IIS) for our application. This architecture is cost effective for us. In the future, we will probably run both the primary and secondary on Linux. We have failed over a few times to the secondary without any application downtime. Users interact with the application server through a browser to visualize the “heartbeat” of the entire manufacturing process. We use the MongoDB aggregation and map reduce framework to aggregate the data and create analytics reporting.

Were you using something different before MongoDB?

Our first version of the Envision platform was developed about 6 years ago using a Microsoft SQL Server database. SQL Server was okay up to a certain point, but we couldn’t scale up without using very expensive hardware. Our primary requirement was to support the throughput that our system needed without resorting to massive server arrays. In our internal benchmarks, MongoDB had 1-2 orders of magnitude better performance than SQL Server for the same hardware. At that point, we decided to build the solution using MongoDB.

Are there specific tools you use to manage your MongoDB deployment?

We currently use Ops Manager internally for development servers, and are looking to implement Ops Manager in production. Ops Manager has been extremely useful in helping us automate our deployment of MongoDB and ensuring we follow MongoDB best practices. It’s also invaluable that Ops Manager provides visibility into key metrics, so we are able to diagnose any potential problems before they happen.

Any best practices of deploying MongoDB that you can share with the community that you think is pertinent?

Understanding your dataset is a critical component. As we understood our dataset better, we were able to size the hardware more appropriately. Another important practice is indexing. Make sure you have index coverage for most of the queries to avoid full collection scans. MongoDB offers an extensive range of secondary indexes that you typically don’t get in a NoSQL database. Capped collections work really well for log type data that does not need to be saved for a long period of time. Finally, use a replica set to help you with performance, always-on availability, and scalability.

How are you measuring the impact of MongoDB?

MongoDB has allowed BEET to reduce the overall infrastructure cost and provide better value to customers. From a development perspective, MongoDB’s flexible data model with dynamic schema has allowed us to make application changes faster, and rapidly add new features to our product to maintain competitive advantage and better serve our customers.

What advice would you give for someone using MongoDB for their project?

MongoDB has best practices guides and whitepapers that are really helpful to ensure you follow the right guidelines. Also, we have been using Ops Manager in our development environment and it has been a huge advantage to troubleshoot any performance or setup issues. This is something we plan to implement in production and recommend other users to do as well.

Girish, thank you so much for taking the time to share your experiences with the MongoDB community.


Harness MongoDB for its IoT Solutions


Viewing all 2423 articles
Browse latest View live