MongoDB Atlas provides you with an easy and secure way of hosting your MongoDB databases in the cloud. Once you've deployed your MongoDB database to Atlas, you may want to visualize your schema, and manipulate your data, all from the power and convenience of the MongoDB Compass GUI .
In this tutorial I will walk you through connecting MongoDB Atlas, our Database-as-a-Service, to Compass, the GUI for MongoDB to update Luke Skywalker from Jedi to Sith Lord. I won’t be using the force; rather, I'll be using CRUD on our favorite Jedi hero through Compass instead of MongoDB shell.
With MongoDB Compass you can ad hoc queries or interact with full CRUD functionality, without detailed knowledge of the MongoDB query language. Compass is pretty versatile – you can also get immediate insight into server status and query performance with visual explain plans and index utilization. We’ll come back to these.
Getting Started
Before we install Compass and run our Atlas Cluster here are a few things to be aware of:
- Compass is free for development usage. For production use, you will need an Atlas Professional subscription.
- We'll be using an M0 Atlas Cluster, which is available for free. This free tier does include some limitations, which you can view in our documentation.
- Because I am connecting from a remote system (my laptop) I will have to use an FQDN (fully qualified domain name) to ensure I am connecting to my primary.
- Ensure you have MongoDB 3.4 (and in particular, the MongoDB shell) installed on your local computer you'll be working with. (Our free tier requires that you use 3.4, the most recent version of MongoDB.)
Installing Compass
Installing Compass on my Mac is a simple process. I can go to the MongoDB Download Center. There I can get the latest version of Compass for my operating system.
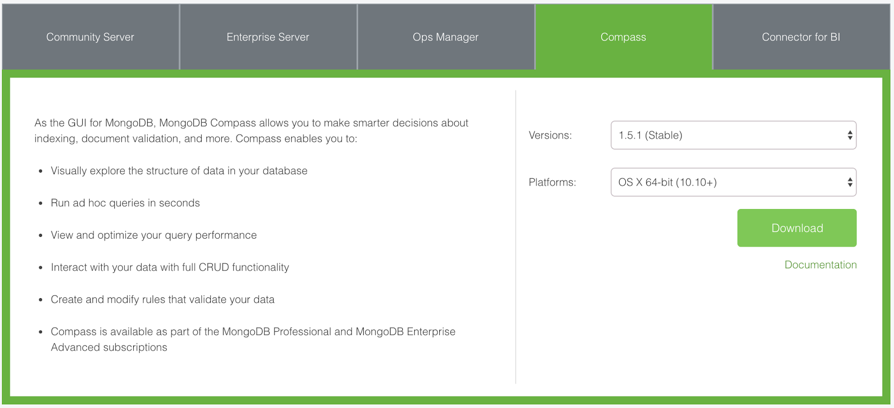
Drag, drop, and go … we're already finished with our installation of Compass. It's time to spin up our M0 MongoDB Atlas Cluster, import our data, and then finally visualize it with Compass.
Your M0 Cluster
If you’re just getting started with a small test project on MongoDB, we recommend using our free tier M0 instance on Atlas.
Let's go to Atlas and spin up our M0:
- Go to https://www.mongodb.com/atlas
- Log in or sign up (if you have no existing account)
- Click on Build a New Cluster, and make sure to keep hold of your username and password if you haven't created them in the past. (I like to set them as bash variables $USERNAME and $PASSWORD)
- Select M0 (you are only permitted one per group) and provide it a name. You will only be able to launch your M0 in the us-east-1 region.
- Click Confirm & Deploy
- You'll be prompted for a CAPTCHA:
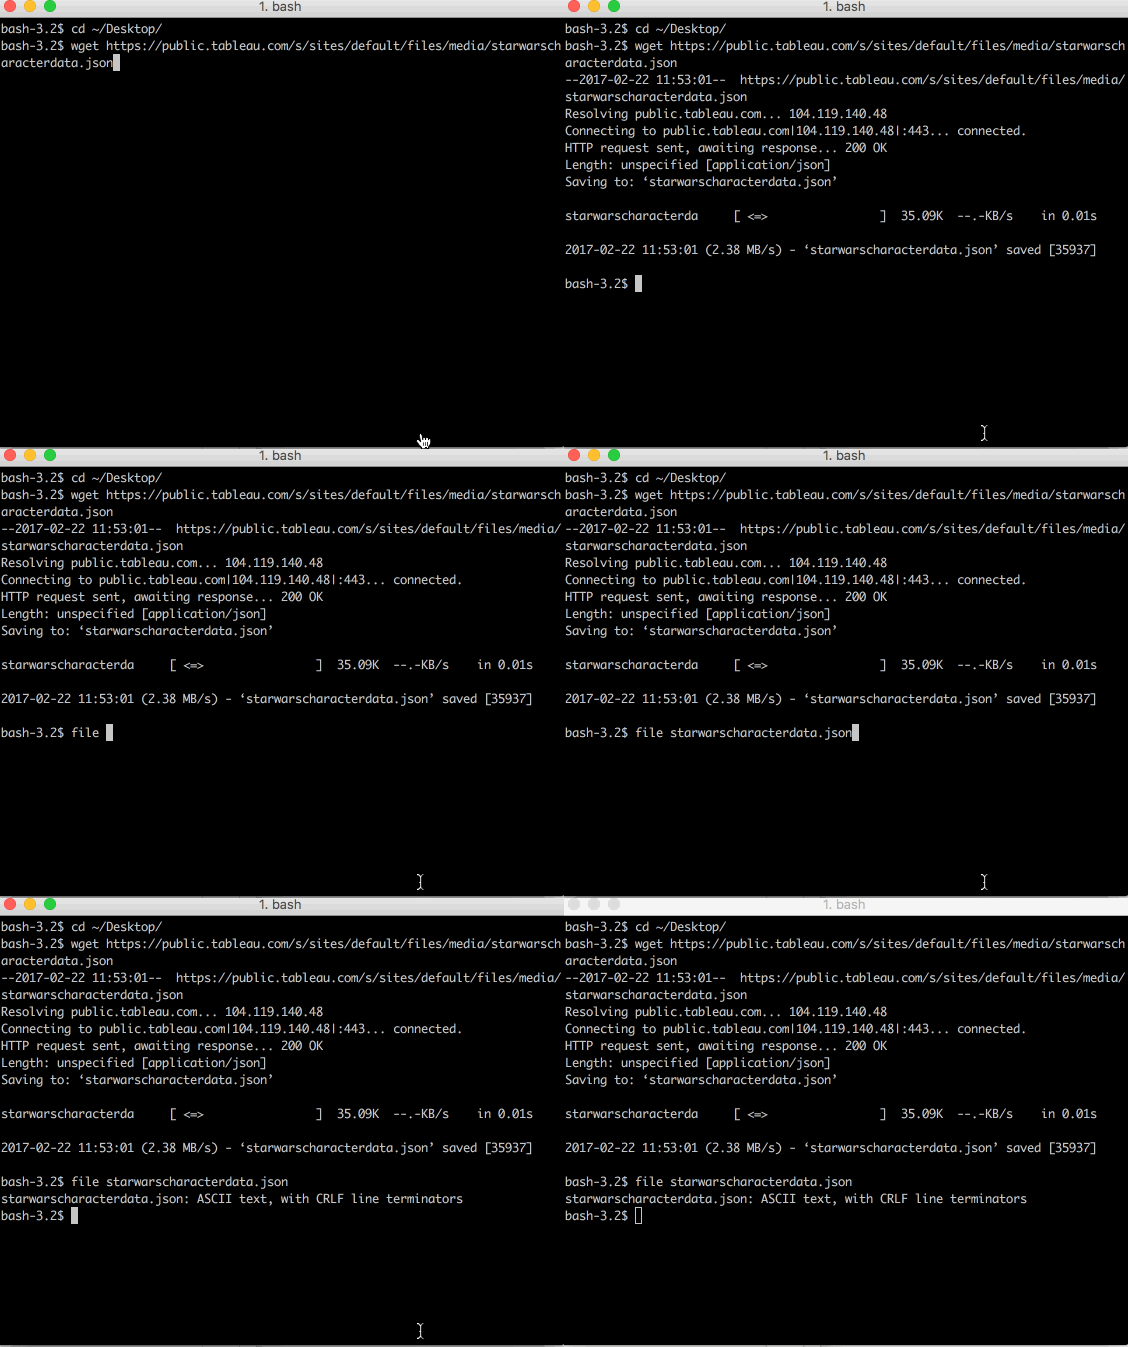
Confirm you are not a robot and your cluster will begin the build process. This could take about 7 - 10 minutes. I used the few minutes to snag a dataset I will be using to view and manipulate with Compass. Star Wars has been on my mind recently, so I wanted to manipulate and view this Star Wars characters JSON dataset provided by our friends at Tableau. Simply download the JSON file and save it to your desktop.
Import the Dataset
To import the JSON dataset to MongoDB, I used mongoimport, which is part of the MongoDB suite of binary tools. I ran the following command from my Mac to ensure that I had the proper 3.4 version installed:
bash-3.2$ mongoimport --version
mongoimport version: r3.4.0
git version: 3cc9a07766fb55de63e81a13e72f3c5a7c07f477
Go version: go1.7.4
  os: darwin
  arch: amd64
  compiler: gc
OpenSSL version: OpenSSL 1.0.2j 26 Sep 2016
At this point I needed to go back to MongoDB Atlas and grab our details about our primary so I can import our data to it. I went to the Atlas interface and clicked on my Cluster name:

Once I click on Cluster0, I see the overview dashboard. You can easily identify your primaries and secondaries in this view:

By clicking one of the individual node names in this view, you'll find the full hostname with the port to connect to for the individual host, You will also see the node's current role in the cluster (Primary or a Secondary):
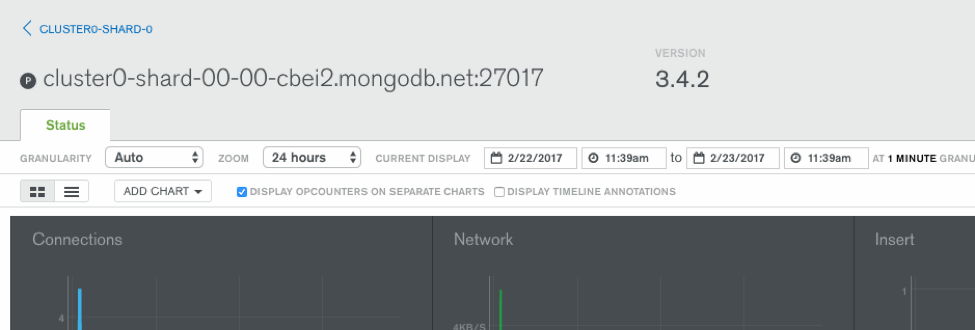
I copy the hostname if the primary node, and then use this along with our username and password to import our JSON data to Atlas:
bash-3.2$ mongoimport --host cluster0-shard-00-00-cbei2.mongodb.net:27017 --db starwars --type json --file ~/Desktop/starwarscharacterdata.json --jsonArray --authenticationDatabase admin --ssl --username $USERNAME --password $PASSWORD
2017-02-22T12:08:18.816-0500    no collection specified
2017-02-22T12:08:18.816-0500    using filename 'starwarscharacterdata' as collection
2017-02-22T12:08:18.922-0500    connected to: cluster0-shard-00-00-cbei2.mongodb.net:27017
2017-02-22T12:08:19.005-0500    imported 82 documents
Easy stuff, so let's get back to why we did all this: Compass.
Logging in with Compass
When I log in with Compass, I needed to ensure the node I’m connecting to is the primary replica set member. Without this, I won't be able to actually write to our database if we want to edit our data. If you are uncertain of which node is your primary, go back to the last step and follow the directions on finding the primary to your cluster.
Connecting to MongoDB using Compass is fairly simple: just add in the information we already have (username, password, host) and then connect. I really like the ability you have to save these configurations. If this database becomes something I work with more in the future (say, if I want to add some new characters from Rouge One), I'll be able to connect quickly. If my primary replica set member were to change, the hostname might really be the only part I'll need to modify in the future.
Let's look at what I entered in order to create my connection:
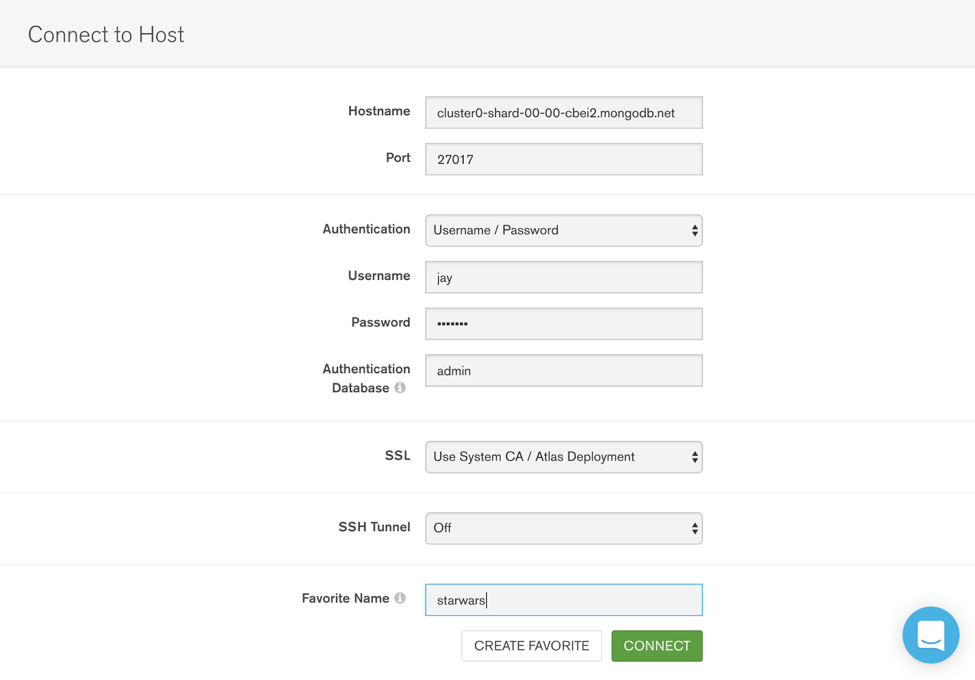
This simple view and the ability to save all of the data makes getting started extremely fast. If you need help, just click the chat icon to chat directly with the Compass team.
We're IN!
Once I click connect, I’m able to view the starwars database and collection.
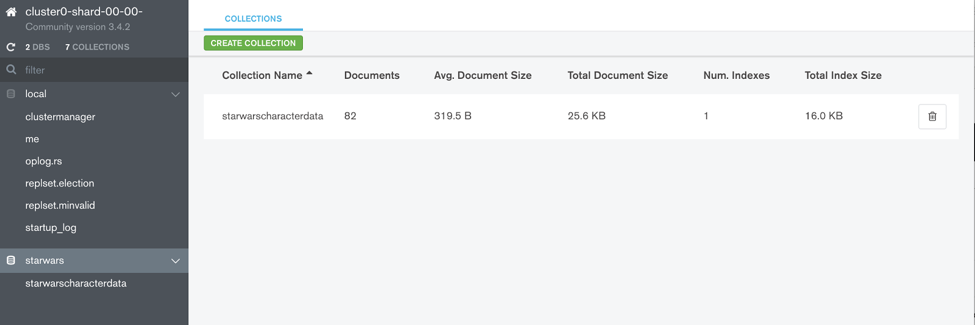
I am now able to query, view and edit any of the documents now hosted on our Atlas Cluster. I can also review performance, configure document validation, and even see how various queries are executed – but those are beyond the scope of this tutorial.
To explore Compass’s CRUD capabilities, I’ll try a very simple exercise of modifying a piece of data related to the document for Luke Skywalker.
I navigate to the document for Luke, click the small pencil to the right, and then begin editing the data.. Let's make our Jedi friend look a bit more Sith today by giving him red eyes:
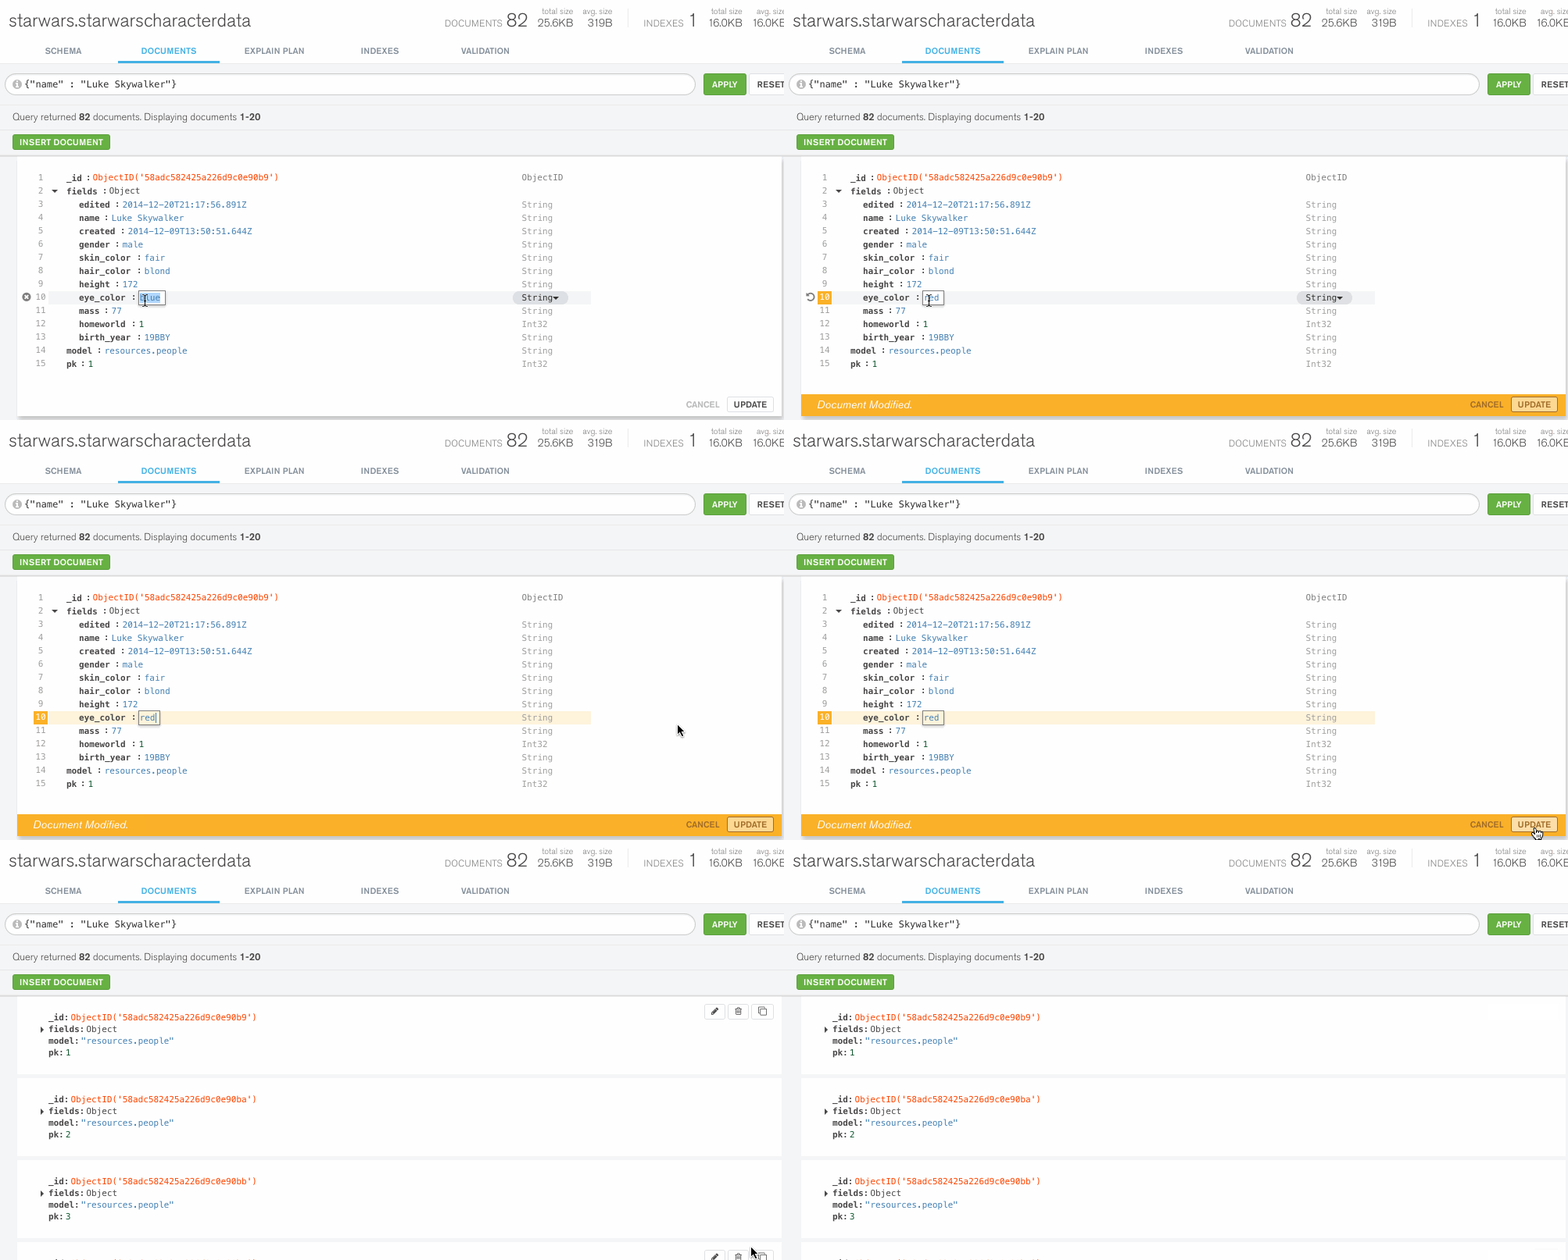
This is something I could have done from the shell, but why? With this view, I have more visibility into the structure of other documents in this collection. Compared to the shell, Compass offers me the ability to see which fields in the document were strings and which were integers. Functionality like this helps those new to MongoDB to get productive faster, and are still super helpful, even if you’re familiar with how to access the database via the shell.
In Compass, I have the ability to perform CRUD operations on my data without having to know the full query language. I can visualize the cluster, get performance metrics,and do things like view geospatial data graphically.
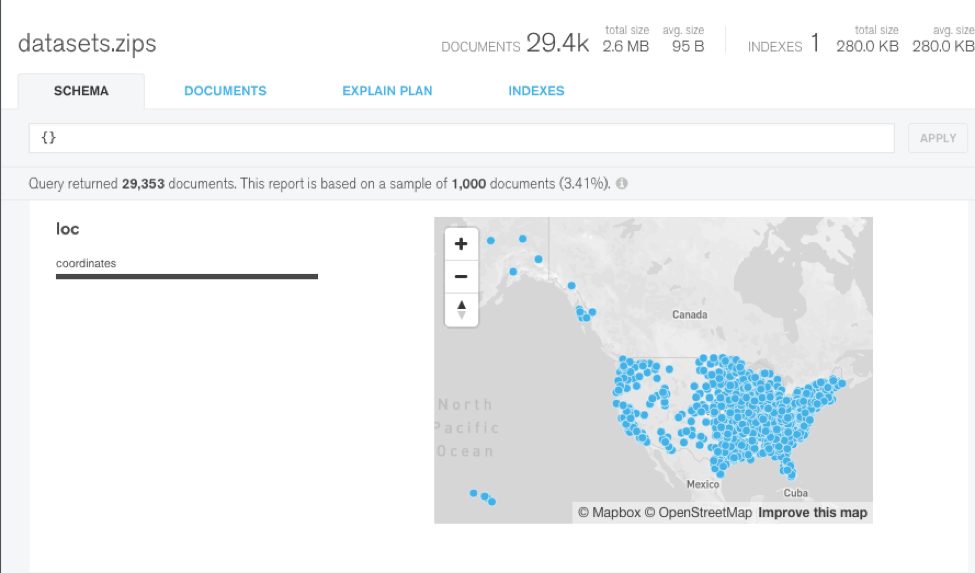
The MongoDB shell is powerful, but it can't do graphics. Features like point and click access to our data really save time and help DBAs and SysAdmins. No longer do they have to learn the command-line methods of handling queries directly – rather by using Compass, they'll be able to visualize their MongoDB datasets quickly and easy.
For some additional information on using Compass, you can review the following videos:
An Introduction to MongoDB Compass
MongoDB Compass Query Building
About the author - Jay Gordon
Jay is a Technical Account Manager with MongoDB and is available via our chat to discuss MongoDB Cloud Products at https://cloud.mongodb.com.