Creating an API that exposes data doesn’t have to be complicated. With MongoDB Stitch, you can create a data enabled endpoint in about 10 minutes or less.
At the heart of the entire process is MongoDB Stitch’s Services. There are several from which to choose and to create a data enabled endpoint, you’ll choose the HTTP Service with a Webhook.
Adding a Stitch Service

When you create an HTTP Service, you’re enabling access to this service from Stitch’s serverless functions in the form of an object called context.services. More on that later when we create a serverless function attached to this service.
Name and add the service and you’ll then get to create an “Incoming Webhook”. This is the process that will be contacted when your clients request data of your API.
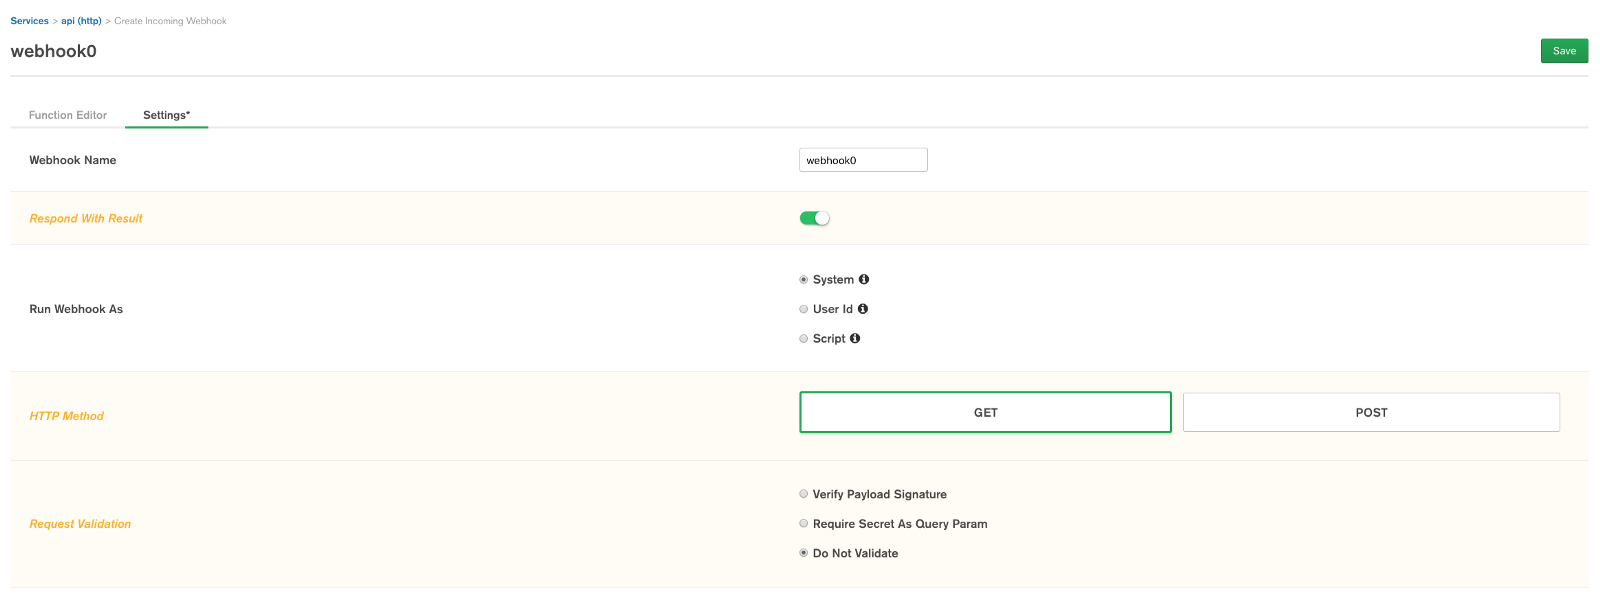
Call the webhook whatever you like, and set the parameters as you see below:

We’ll create this API to respond with results to GET requests. Next up, you’ll get to create the logic in a function that will be executed whenever your API is contacted with a GET request.
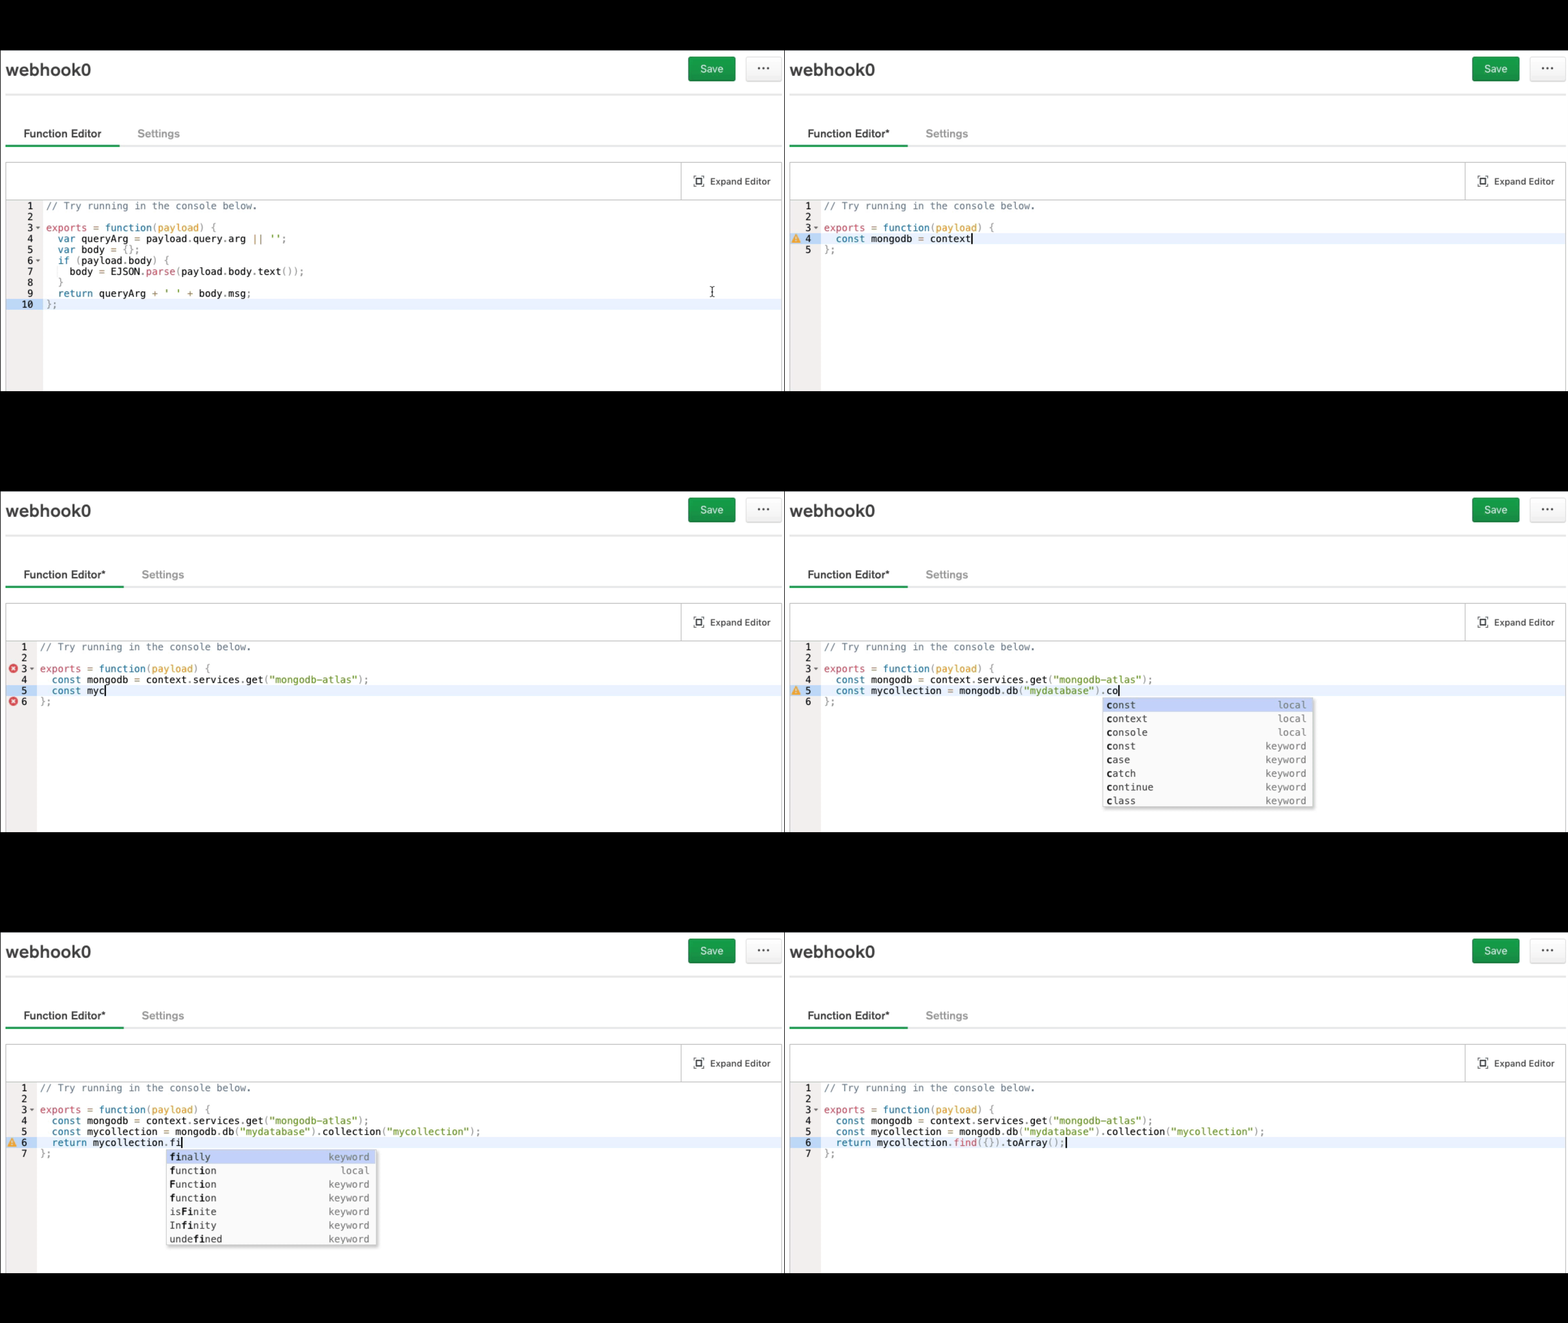
Defining the Function

Before we modify this script to return data, let’s take a look at the Settings tab — this is where you’ll find the URL where your clients will reach your API.

That’s it — you’ve configured your API. It’s not going to do anything interesting. In fact, the default responds to requests with “Hello World”. Let’s add some data.
Assuming we have a database called mydatabase and a collection of contact data called mycollection, let’s write a function for our service:

And here’s the source:
exports = function(payload) {
 const mongodb = context.services.get(“mongodb-atlas”);
 const mycollection = mongodb.db(“mydatabase”).collection(“mycollection”);
 return mycollection.find({}).toArray();
};
This exposes all documents in the database whenever a client calls the webhook URL associated with our HTTP Service. That’s it.
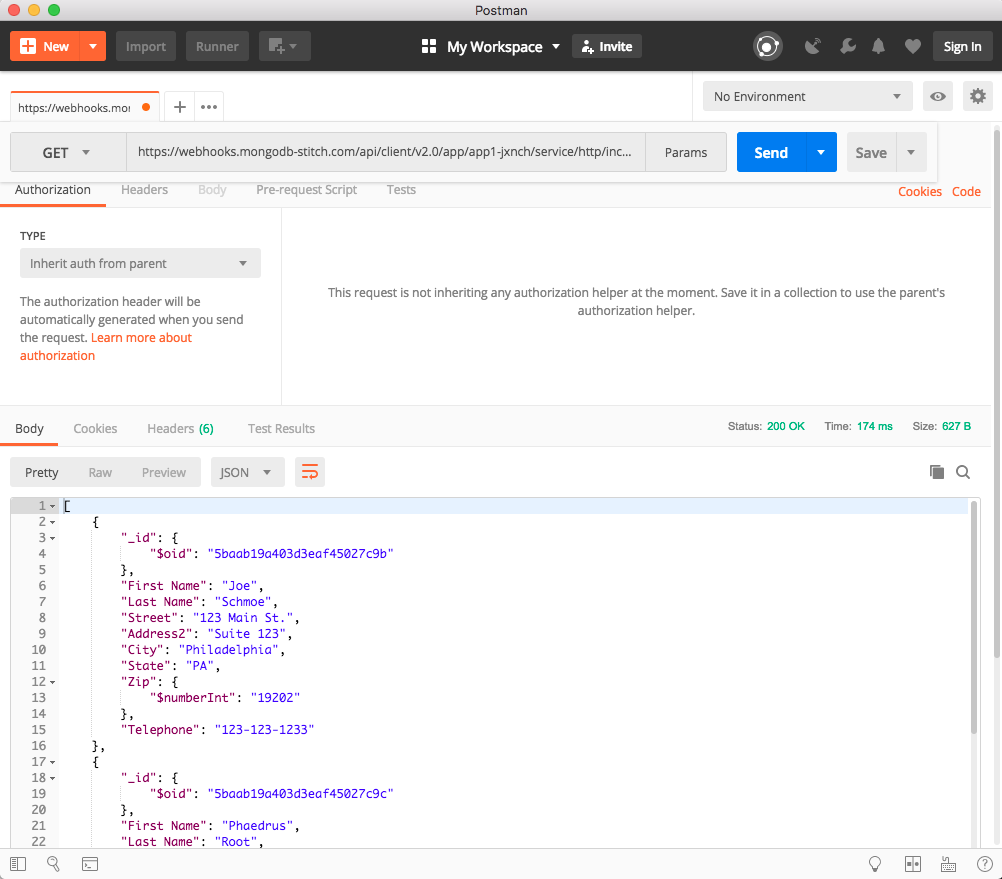
Let’s use Postman to show how this works. Grab your API Endpoint URL from the service settings screen. Mine is as follows — yours will differ.

https://webhooks.mongodb-stitch.com/api/client/v2.0/app/devrel-mrmrq/service/api/incoming_webhook/webhook0

Paste that into the GET URL field and hit Send, you should see something similar to the following:

Check out the GitHub Repository to review the code and try it yourself and review the screencast where I create a data enabled API in 10 Minutes with MongoDB Stitch.
Want to try this for yourself? Sign up for a free MongoDB Atlas account. Looking to leverage an API for integration with MongoDB? Read Andrew Morgan’s article on Building a REST API with MongoDB Stitch.
Additional Resources:
- MongoDB Stitch Documentation
- Creating your first Stitch app? Start with one of the Stitch tutorials.
- Want to learn more about MongoDB Stitch? Read the white paper.