Building apps has never been faster, thanks in no small part to advancements in virtualization. Lately, I’ve been exploring better ways to build and deploy apps without having to worry about ongoing front-end work, such as patching Linux machines, replacing them when they fail, or even having to SSH into systems.
In this two-part tutorial, I will share how to build a Node.js app with MongoDB Atlas and deploy it easily using Amazon EC2 Container Service (ECS).
In part one, we'll cover:
- Using Docker for app deployment
- Building a MongoDB Atlas Cluster
- Connecting it to a Node.js-based app which allows full CRUD operations
- Launching it locally in a development environment.
In part two, we'll get our app running in a Linux container on AWS by installing some tools, configuring a few environment variables, and launching a Docker cluster.
By the end of this two-part tutorial, you'll see how to work with Node.js to start an application, how to build a MongoDB cluster for the app, then finally, how to use AWS to deploy that app in containers.
A Quick Intro To Docker
(Already know about Containers & Docker? Skip ahead to the tutorial.)
Docker makes it simple for developers to build, ship, and run distributed applications across different environments. It does this by helping you “containerize” your application.
What's a container? The Docker website defines a container as "a way to package software in a format that can run isolated on a shared operating system". More broadly, containers are a form of system virtualization that allows you to run an application and its dependencies in resource-isolated processes. Using containers, you can easily package application code, configurations, and dependencies into easy-to-use building blocks specifically built to run your code. This ensures that you can deploy quickly, reliably, and consistently regardless of the deployment environment, and allows you to focus more on building your app. Moreover, containers make it easier to manage microservices and support CI/CD workflows where incremental changes are isolated, tested, and released with little to no impact to production systems.
Getting started
In the example we'll walk through in this post, we're going to build a simple records system using MongoDB, Express.js, React.js, and Node.js called mern-crud. We'll combine several common services on the AWS cloud platform to build a fully functional, containerized application with auto-scaling and load balancing. The core of our front end will be run on Amazon EC2 Container Service (ECS).
In part one, I'll set up our environment and build the application on my local workstation. This will show you how to begin using MongoDB Atlas along with Node.js. In the second part we'll wrap everything up by deploying to ECS with coldbrew-cli, an easy ECS command line utility.
Below you'll find the basics of building an application that will allow you to perform CRUD operations in MongoDB.
Requirements:
- AWS Account
- IAM Access Key
- coldbrew-cli
- MongoDB Atlas Cluster (M0, the free tier of Atlas, is fine)
- Docker (on local computer)
- mern-crud github repo
- git
- Node.js installed locally with Boron LTS (v6.11.2)
Amazon EC2 Container Service (ECS) allows you to deploy and manage your Docker instances using your AWS control panel. For a full breakdown of how it works, I recommend checking out Abby Fuller's "Getting Started with ECS" demo, which includes details on the role of each part of the underlying Docker deployment and how they work together to provide you with easily repeatable and deployable applications.
Configure AWS and coldbrew-cli
AWS Environment Variables
Get started by signing up for your AWS account and creating your Identity and Access Management (IAM) keys. You can review the required permissions from the coldbrew-cli docs. The IAM keys will be required to authenticate against the AWS API; we can export these as environment variables in the command shell we’ll use to run coldbrew-cli commands:
export AWS_ACCESS_KEY_ID="PROVIDEDBYAWS
export AWS_SECRET_ACCESS_KEY="PROVIDEDBYAWS
This permits coldbrew-cli to use our user rights within AWS to create the appropriate underlying infrastructure.
Getting started with coldbrew-cli
Next, we'll work with coldbrew-cli, an open source automation utility for deploying AWS Docker containers. It removes many of the steps associated with creating our Docker images, creating the environment, and auto-scaling the AWS groups associated with our Node.js web servers on AWS. The best part of coldbrew is that it's highly portable and configurable.
The coldbrew documentation states the following:
coldbrew-cli operates on two simple concepts: applications (apps) and clusters.
- An app is the minimum deployment unit.
- One or more apps can run in a cluster, and, they share the computing resources.
- Creating a VPC (You may specify an existing VPC if needed)
- Creating Security Groups
- Setting up Elastic Load Balancing & Auto Scaling Groups
- Building the Docker Containers
- Building the Docker Image
- Pushing the Docker Image to ECR repository
- Deploying image to containers
Manually, all of the tasks listed above would take a nontrivial effort.
To install coldbrew-cli, we can download CLI executable (coldbrew or coldbrew.exe) and put it in our $PATH.
$ which coldbrew
'usr/local/bin/coldbrew
Prepare our app and MongoDB Atlas
ECS will allow us to run a stateless front end to our application. All of our data will be stored in MongoDB Atlas, the best way to run MongoDB on AWS. In this section, we’ll build our database cluster and connect our application. We can rely on coldbrew commands to manage deployments of new versions of our application going forward.
Your Atlas Cluster
Building an Atlas cluster is easy and free. If you need help doing so, check out this tutorial video I made that will walk you through the process. Once our free M0 cluster is built, it’s easy to whitelist the IP addresses of our ECS containers so that we can store data in MongoDB.
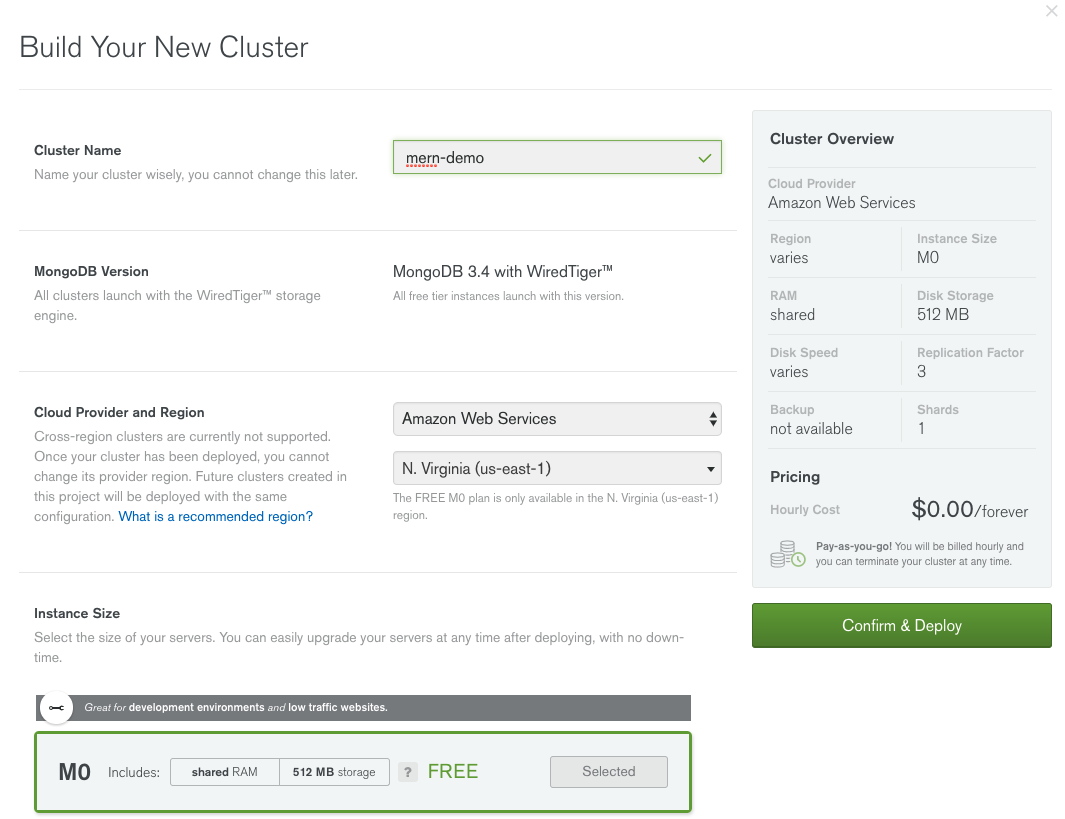
I named my cluster "mern-demo”.
Downloading and configuring the App
Let's get started by downloading the required repository:
$ git clone git@github.com:cefjoeii/mern-crud.git
Cloning into 'mern-crud'...
remote: Counting objects: 303, done.
remote: Total 303 (delta 0), reused 0 (delta 0), pack-reused 303
Receiving objects: 100% (303/303), 3.25 MiB | 0 bytes/s, done.
Resolving deltas: 100% (128/128), done.
Let's go into the repository we cloned and have a look at the code:
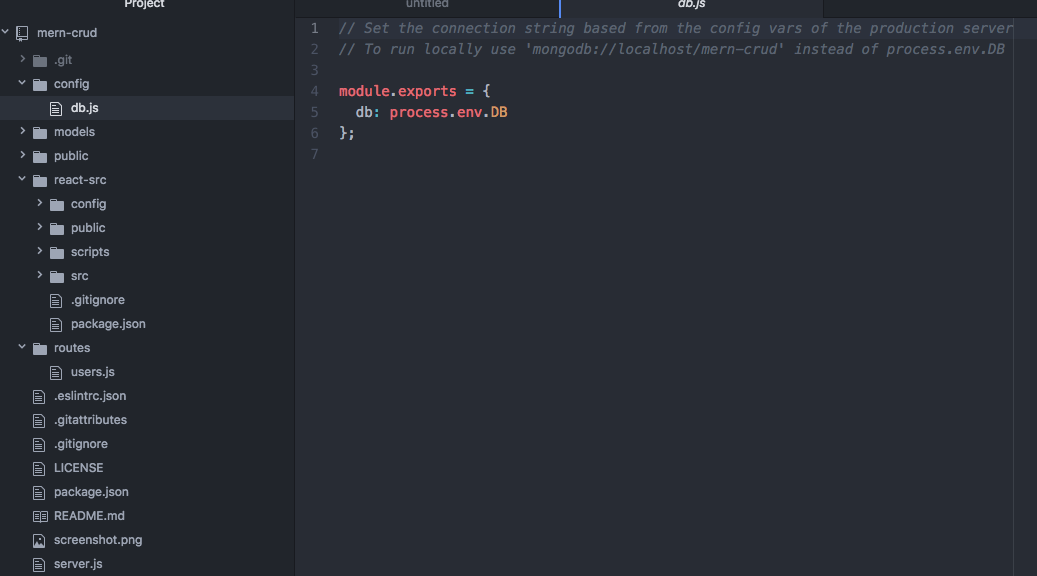
The server.js app is reliant on the database configuration stored in the config/db.js file. We'll use this to specify our M0 cluster in MongoDB Atlas, but we'll want to ensure we do so using user credentials that follow the principle of least privilege.
Securing our app
Let's create a basic database user to ensure that we are not giving our application full rights to administer the database. All this basic user requires is read and write access.
In the MongoDB Atlas UI, click the "Security" option at the top of the screen and then click into “MongoDB Users”

Now click the "Add new user" button and create a user with read and write access to the namespace data is being written to within our cluster.
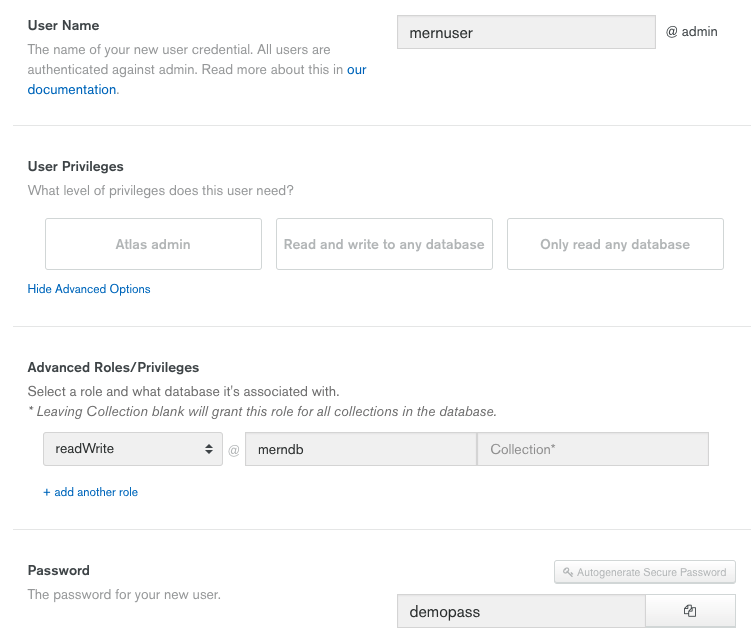
- Enter the user name (I will select mernuser)
- Click the "Show Advanced Options" link
- Select role "readWrite" in the "Database" section "merndb", and leave “collection” blank
- Create a password and save it somewhere to use in your connection string
- Click "Add User"
We now have a user ready to access our application's MongoDB Atlas database cluster. It's time to get our connection string and start prepping the application.
Linking our Managed Cluster to our App
Our connection string can be accessed by going to the "Clusters" section in Atlas, and clicking the "Connect" button.
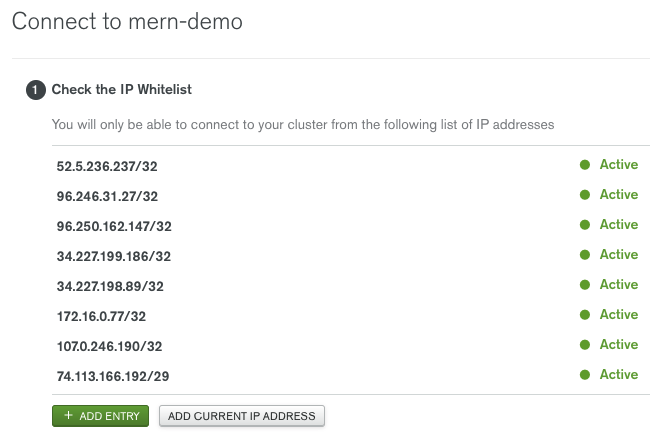
This section provides an interface to whitelist IP addresses and methods to connect to your cluster. Let's choose the "Connect Your Application" option and copy our connection string. Let's copy the connection string and take a look at what we need to modify:
The default connection string provides us with a few parts that require our changes, highlighted in red below:
mongodb://mernuser:demopass@mern-demo-shard-00-00-x8fks.mongodb.net:27017,mern-demo-shard-00-01-x8fks.mongodb.net:27017,mern-demo-shard-00-02-x8fks.mongodb.net:27017/merndb?ssl=true&replicaSet=mern-demo-shard-0&authSource=adminThe username and password should be replaced with the credentials we created earlier. We also need to specify the merndb database our data will be stored in.
Let's add our connection string to the config/db.js file and then compile our application.
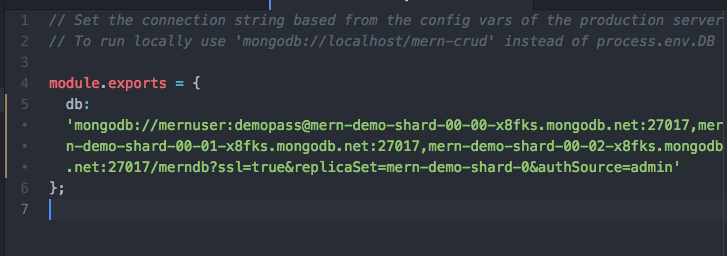
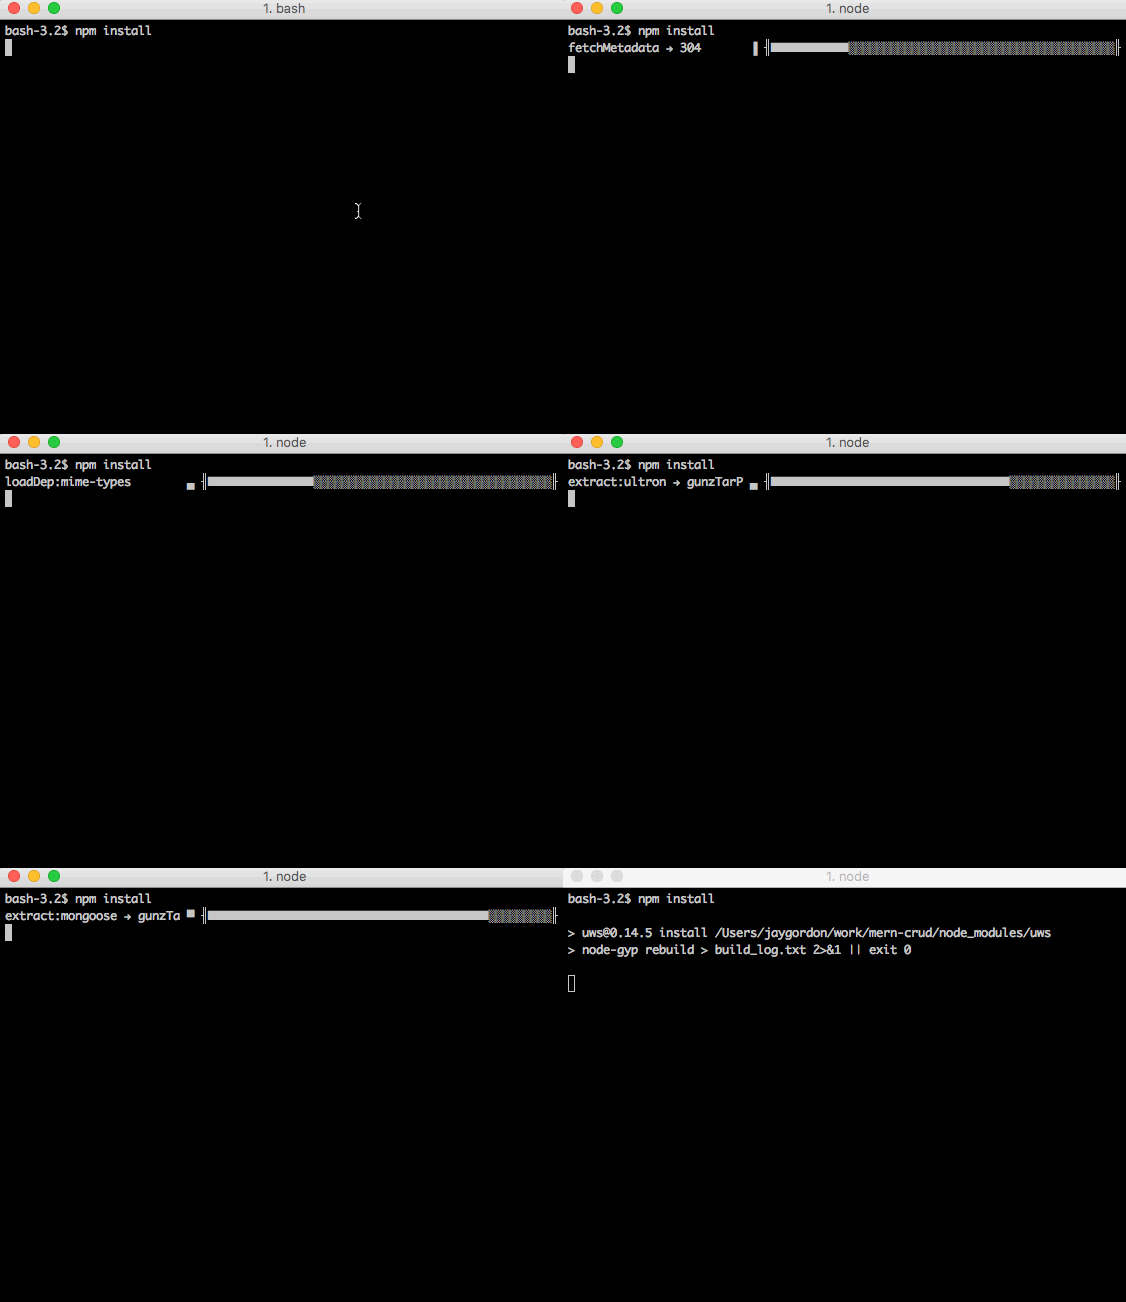
Save the file, then import the application’s required dependencies from the root directory of the repository with the "npm install" command:
Let's whitelist our local IP address so we can start our app and test it's working locally before we deploy it to Docker. We can click "CONNECT" in the MongoDB Atlas UI and then select "ADD CURRENT IP ADDRESS" to whitelist our local workstation:
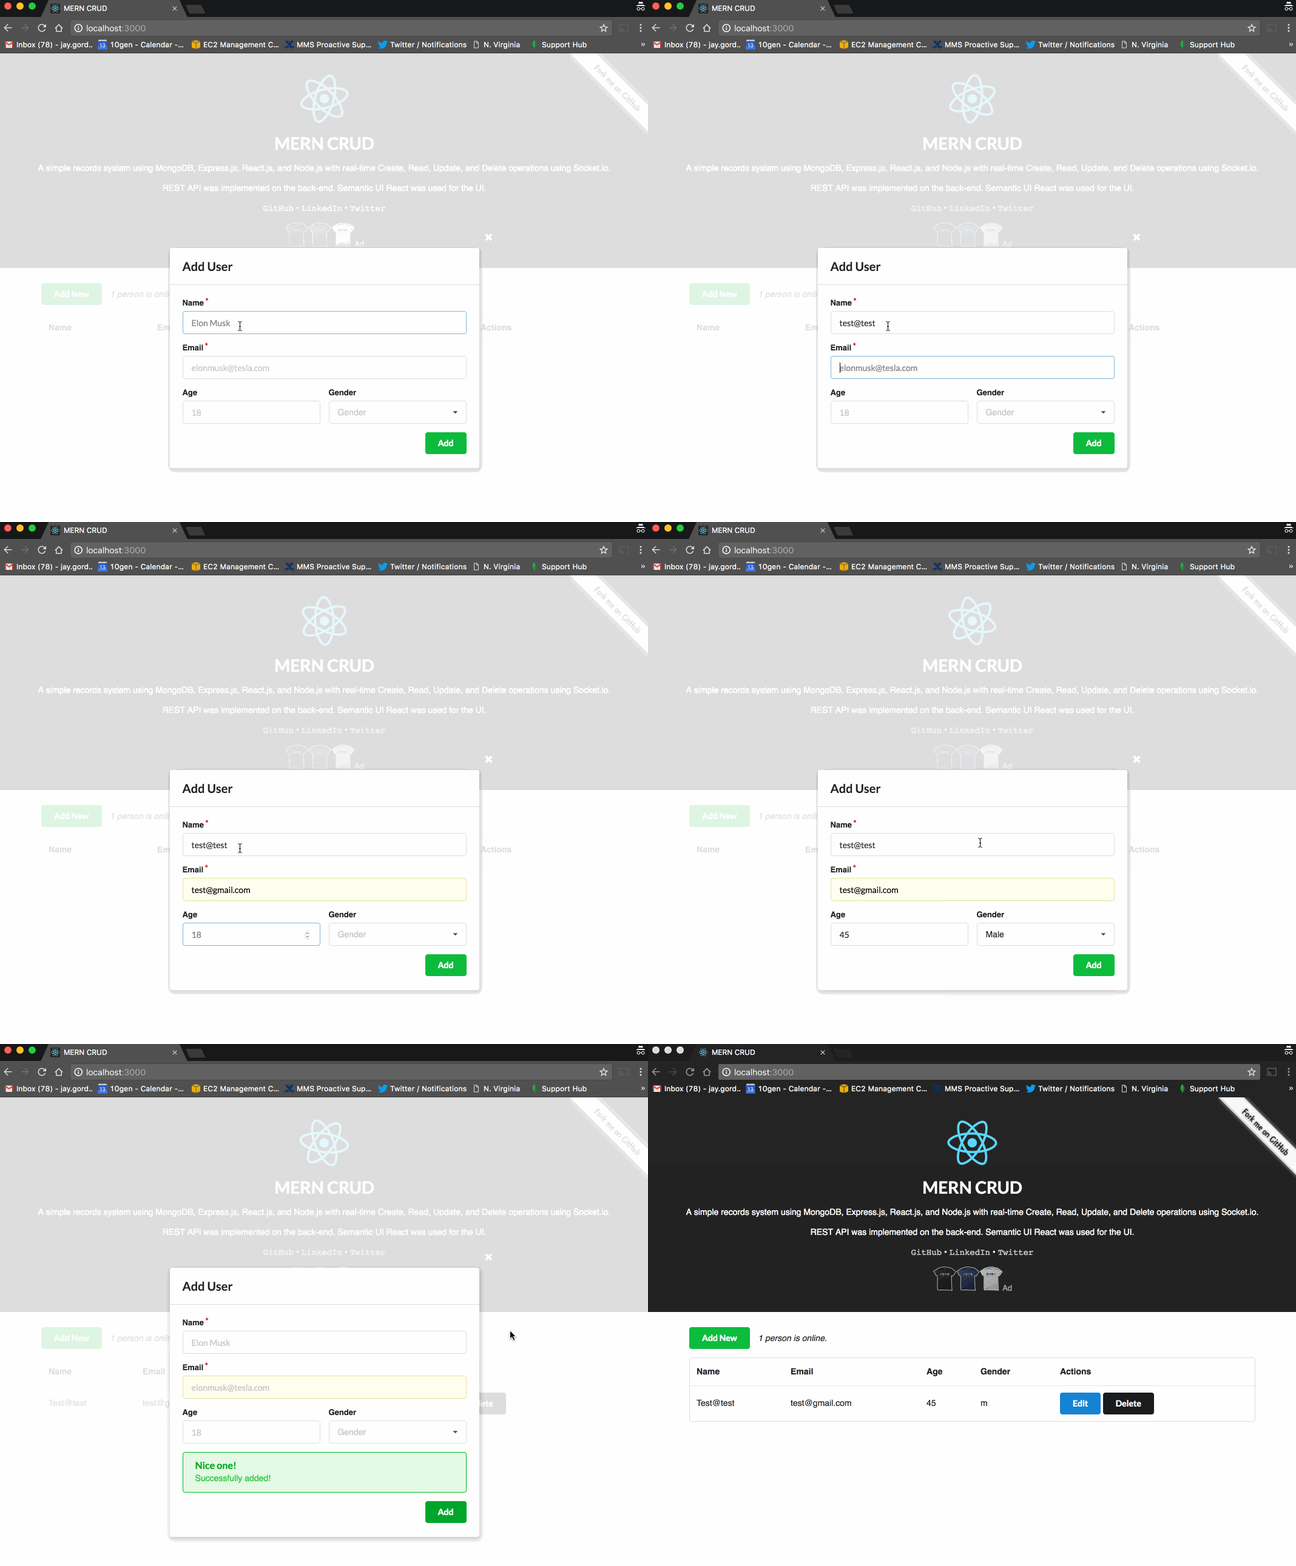
We can now test the app and see that it starts as expected:
$ npm start
> mern-crud@0.1.0 start /Users/jaygordon/work/mern-crud
> node server

Listening on port 3000
Socket mYwXzo4aovoTJhbRAAAA connected.
Online: 1
Connected to the database.
Let's test http://localhost:3000 in a browser:
The hardest part is over, the next part is deploying with coldbrew-cli, which is just a few commands. In part two of this series, we’ll cover how to launch with
If you’re new to managed MongoDB services, we encourage you to start with our free tier. For existing customers of third party service providers, be sure to check out our migration offerings and learn about how you can get 3 months of free service.